QR Code Ticketing - Scanning Admission Tickets at the Door
Method A - Using a Tablet w/Event Manager. This method is by far the most simple and flexible, as it allows you to use a tablet device to look up guests without QR codes, while also having the abilit…

Method A - Using a Tablet w/Event Manager
This method is by far the most simple and flexible, as it allows you to use a tablet device to look up guests without QR codes, while also having the ability to scan QR code tickets from the same device and application. The only downside is that this method will only function properly on a larger screen tablet, cell phones are not supported.
Open Event Manager
In the tablets web browser, navigate the unique Event Manager URL for your event. Proceed to log in with your credentials and navigate to the check-in screen.
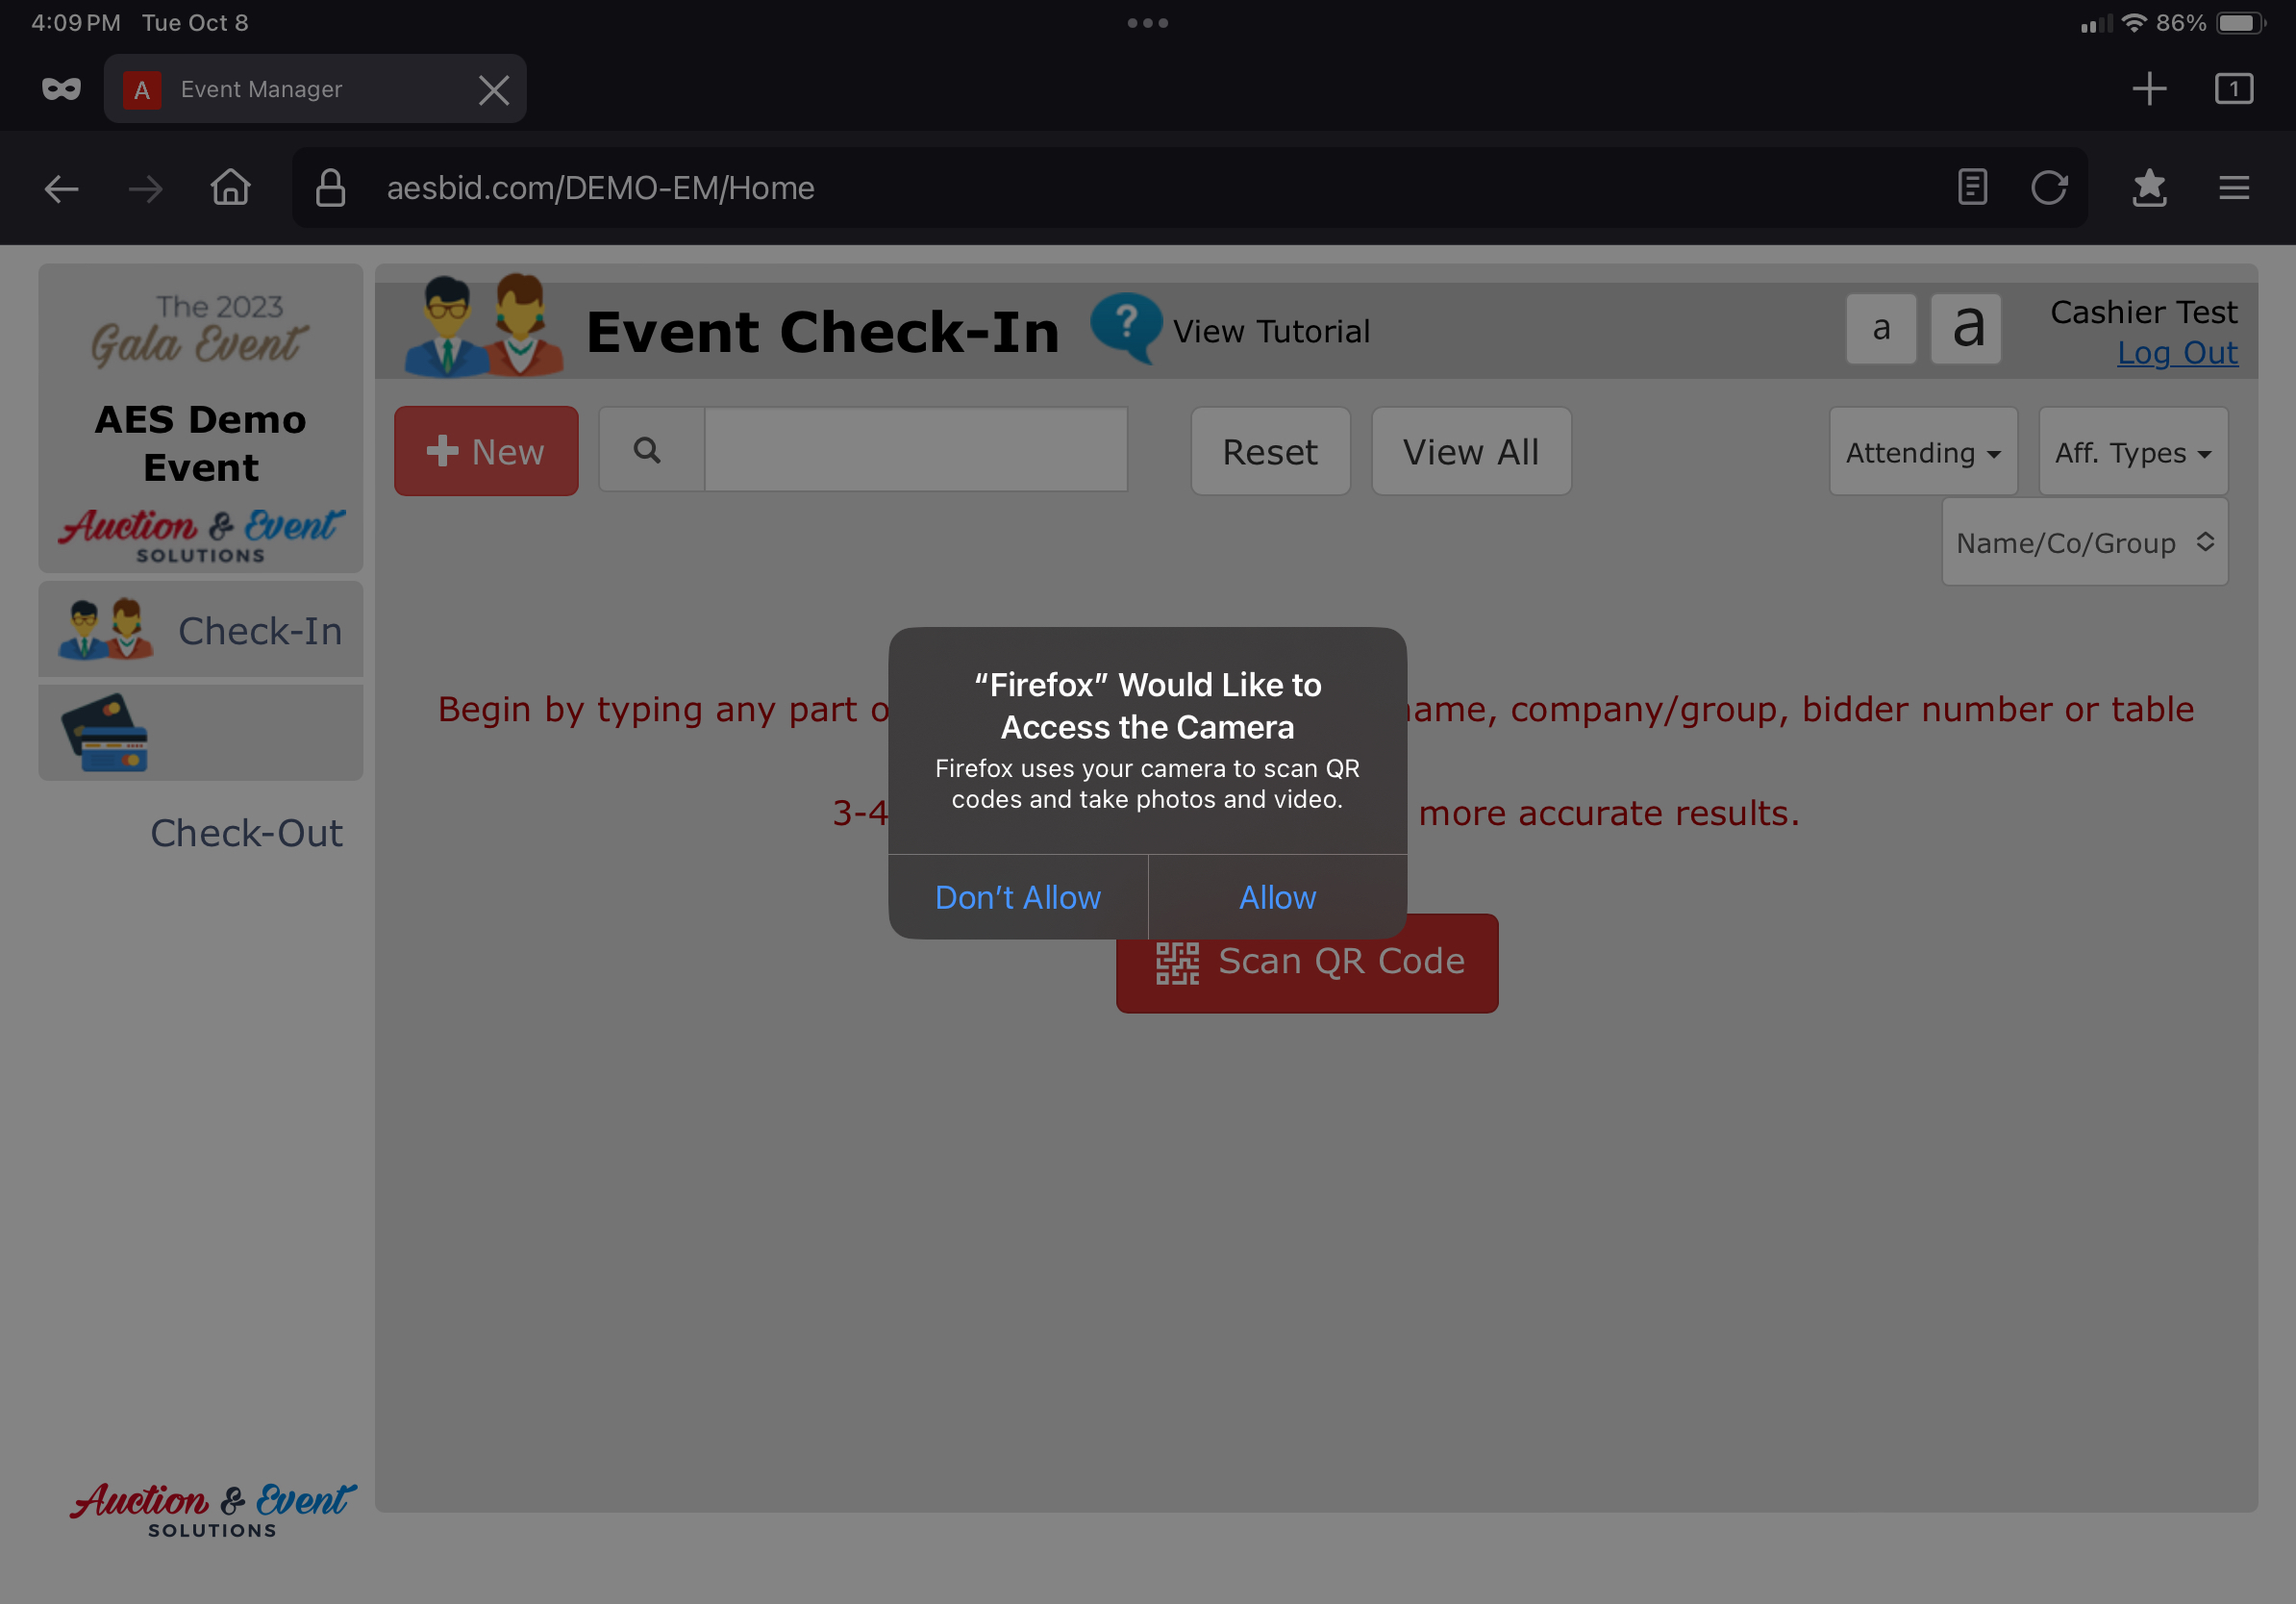
Here you will have two options - searching for a guest by name/company/group, or scanning their QR code.

Select Scan QR code and the device will ask for authorization to access your camera. You must click "allow" to proceed.
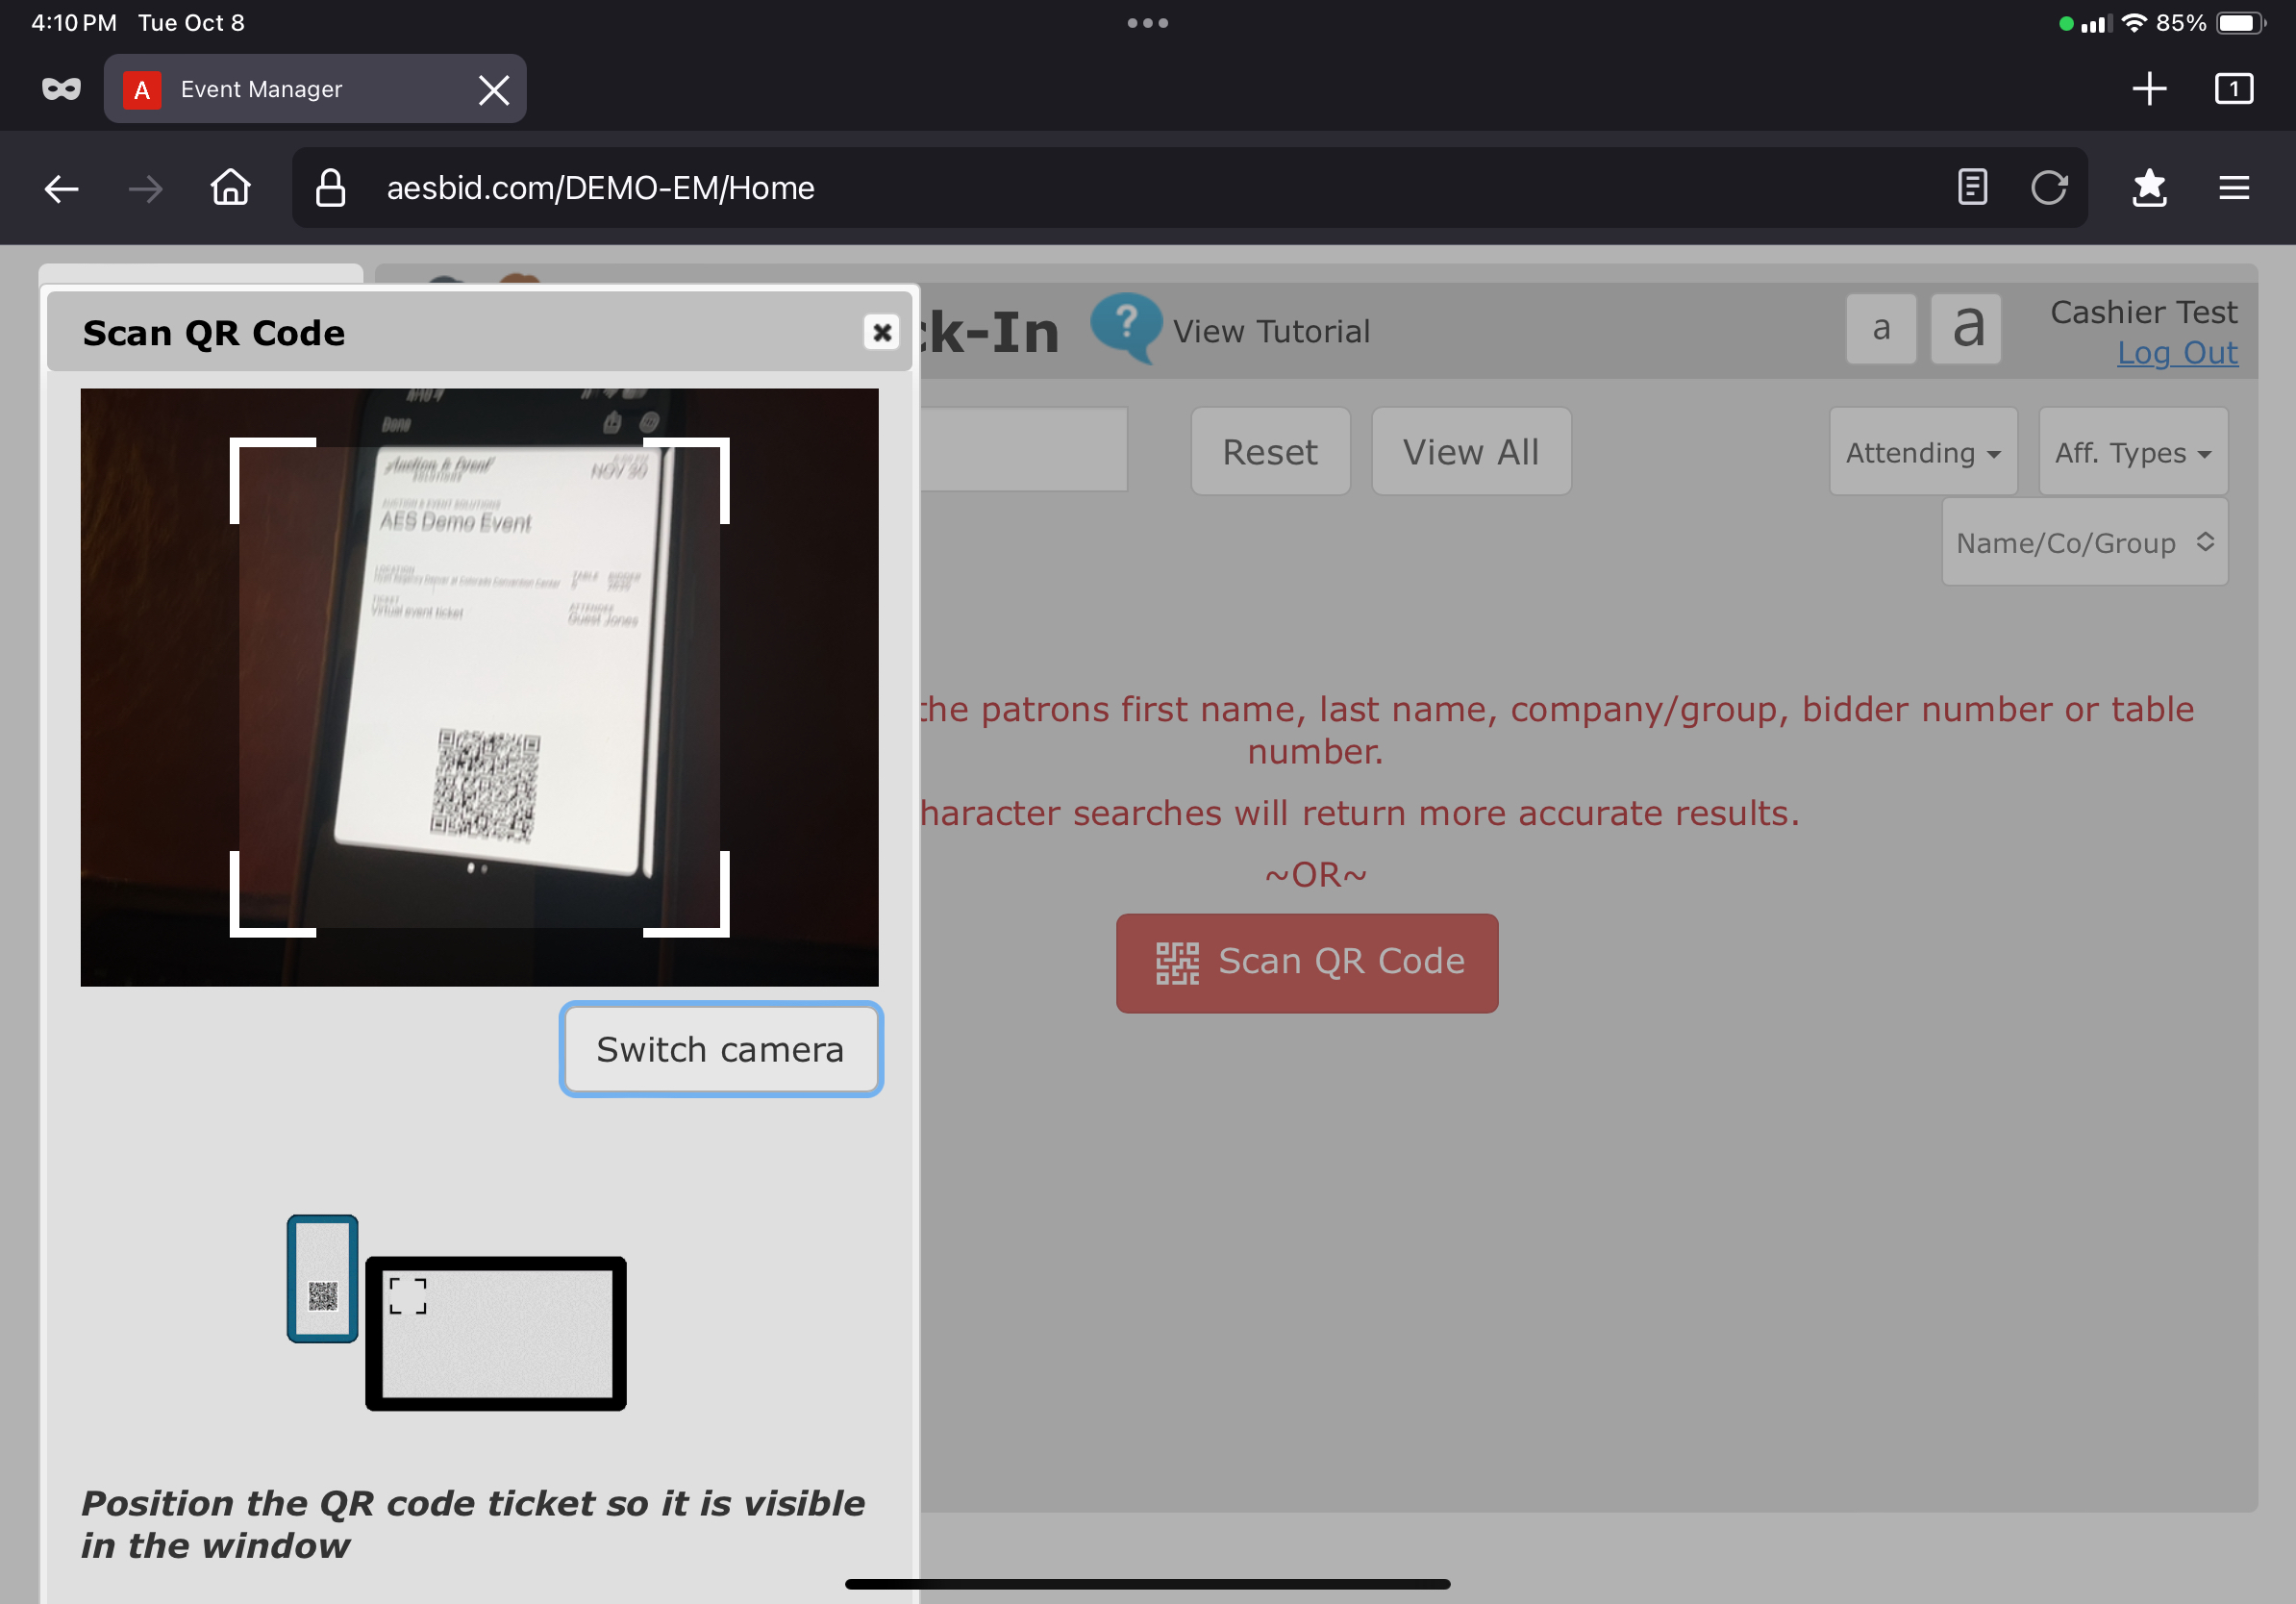
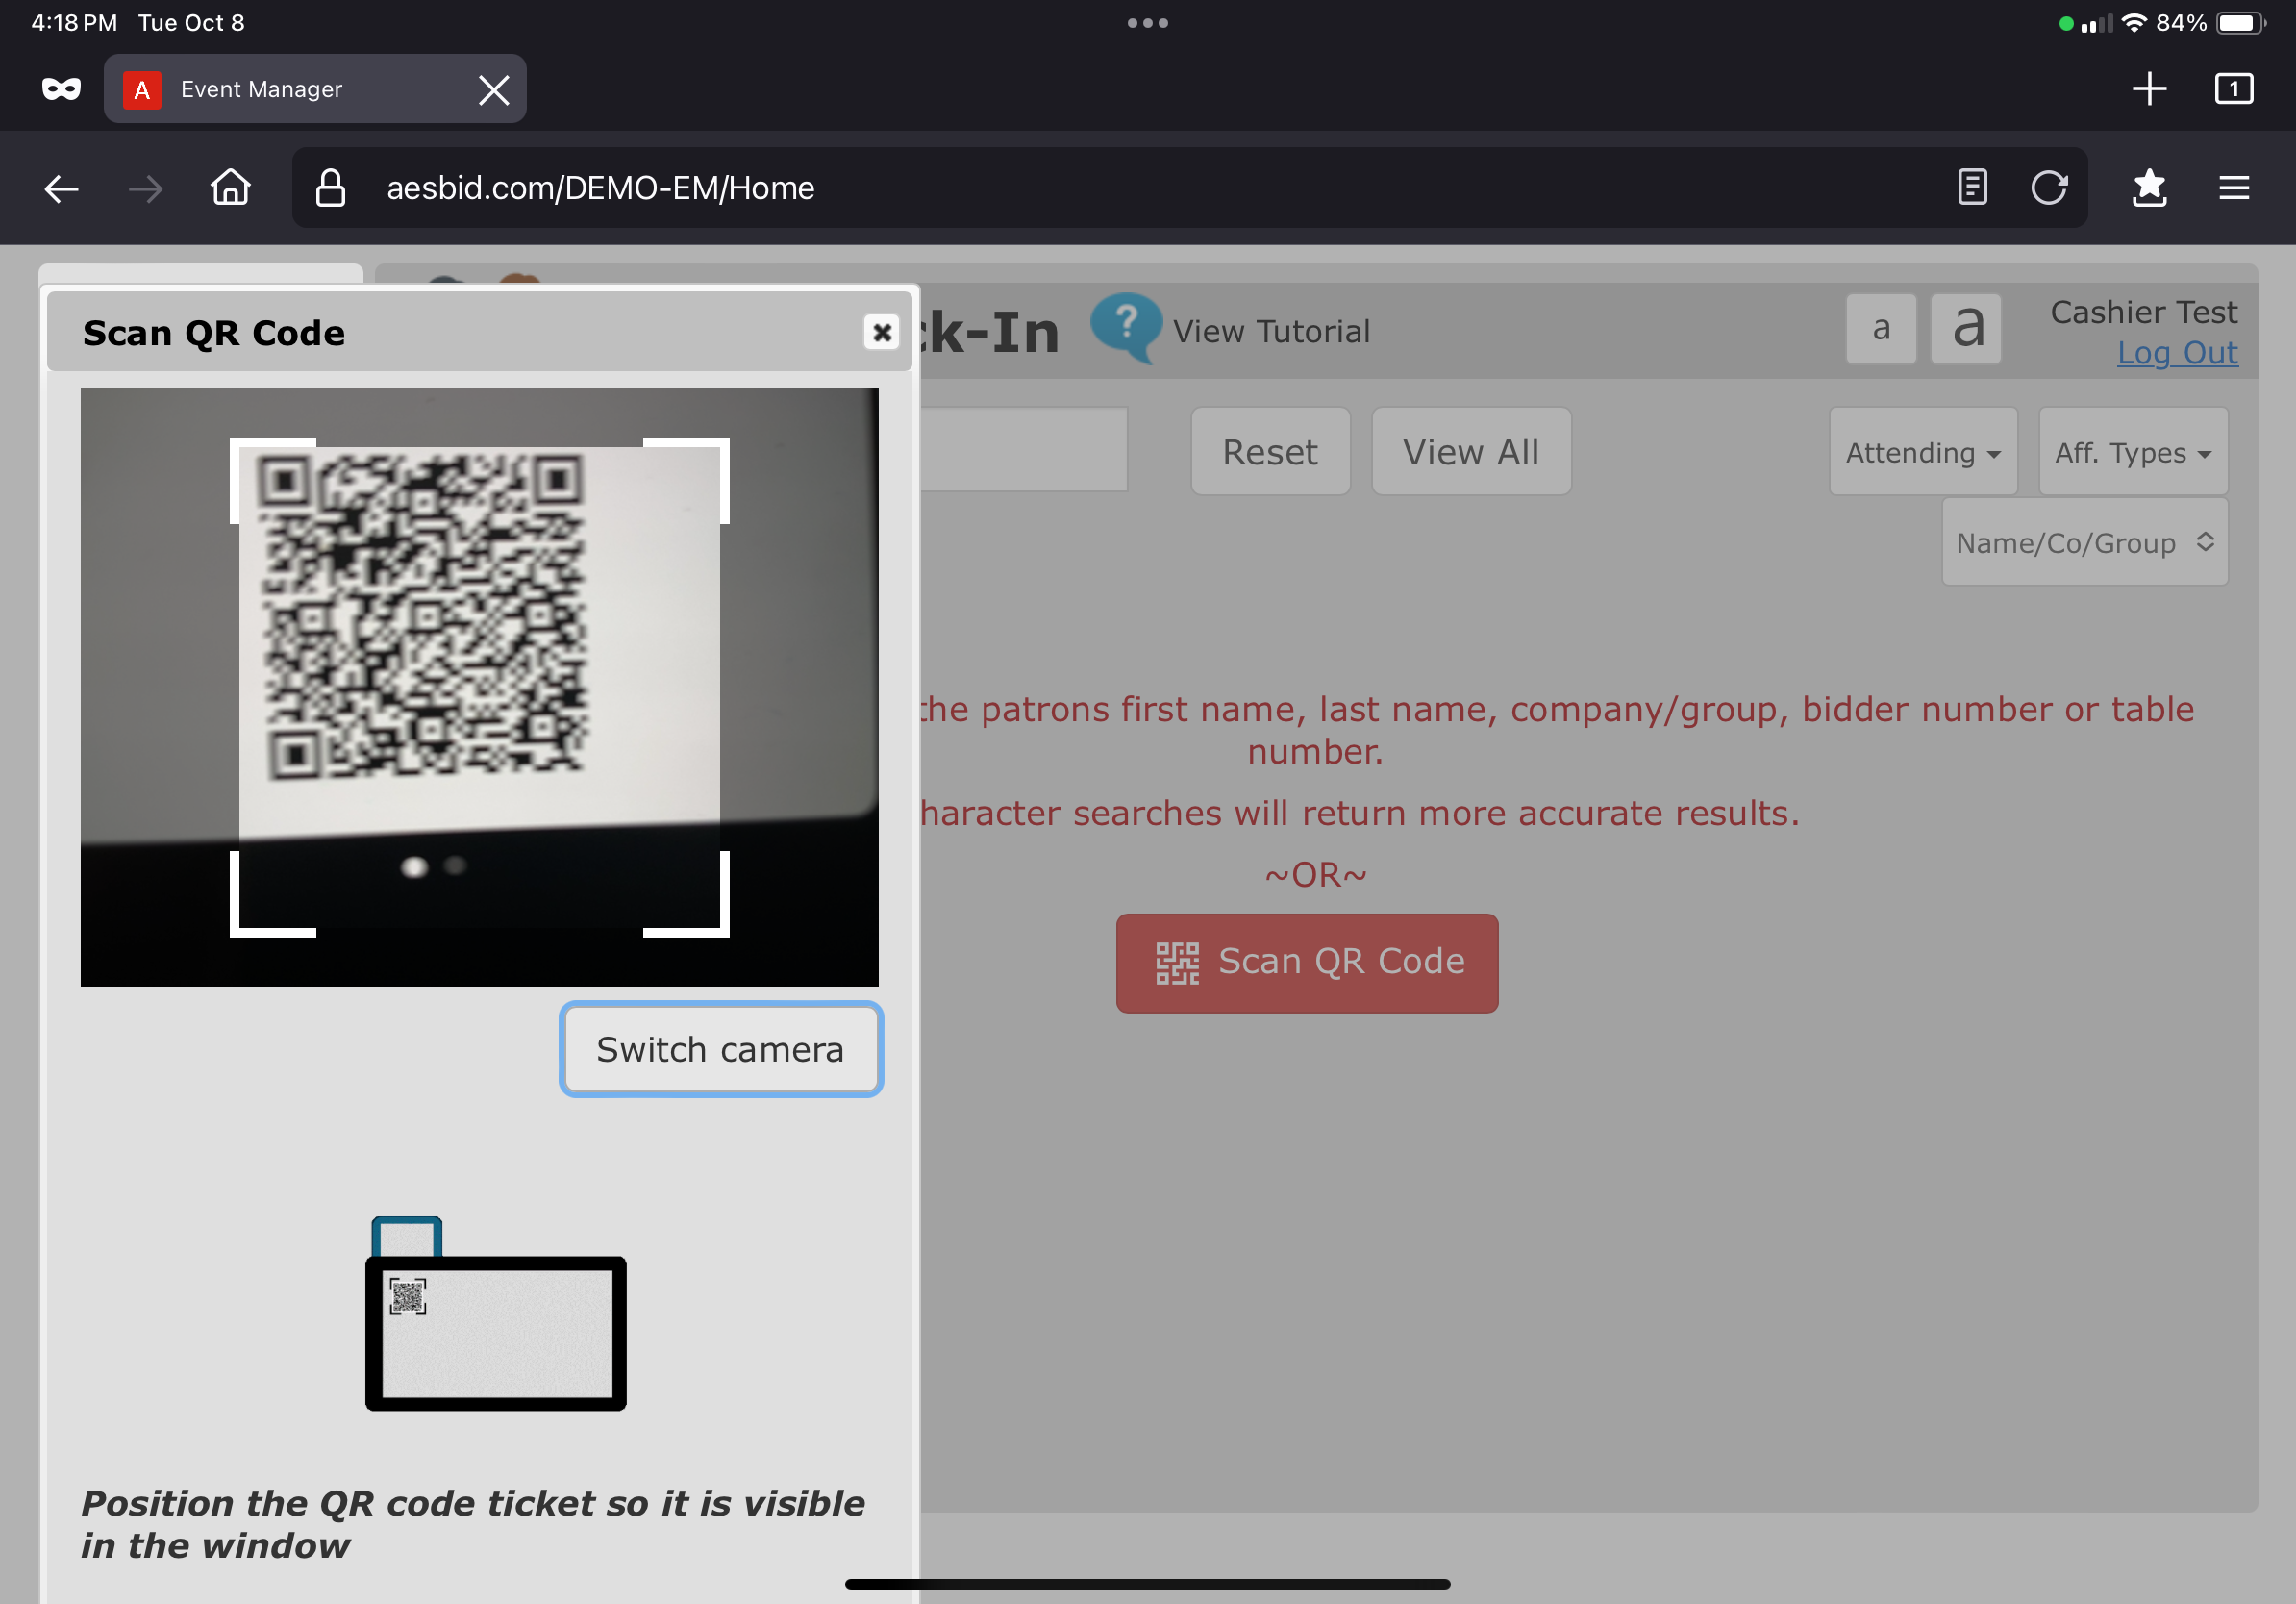
Now you should have access to the camera on your device. Switch camera until you can see the output from the REAR camera as this is easiest to use.
Hold the QR ticket still as possible (if you can, set it on a table) then move the tablet until the QR code fills most of the screen and is in focus. This may require a little practice to get used to, but once you do it should go very quickly.
Method B - Using a Cell Phone w/Camera App
This method may be preferred when you have limited tablets available, or if you prefer to have a dedicated QR ticket scanning area. With this method you can utilize any cell phone with active internet and camera, such as volunteer or staff phones.
Authorizing your devices to scan tickets
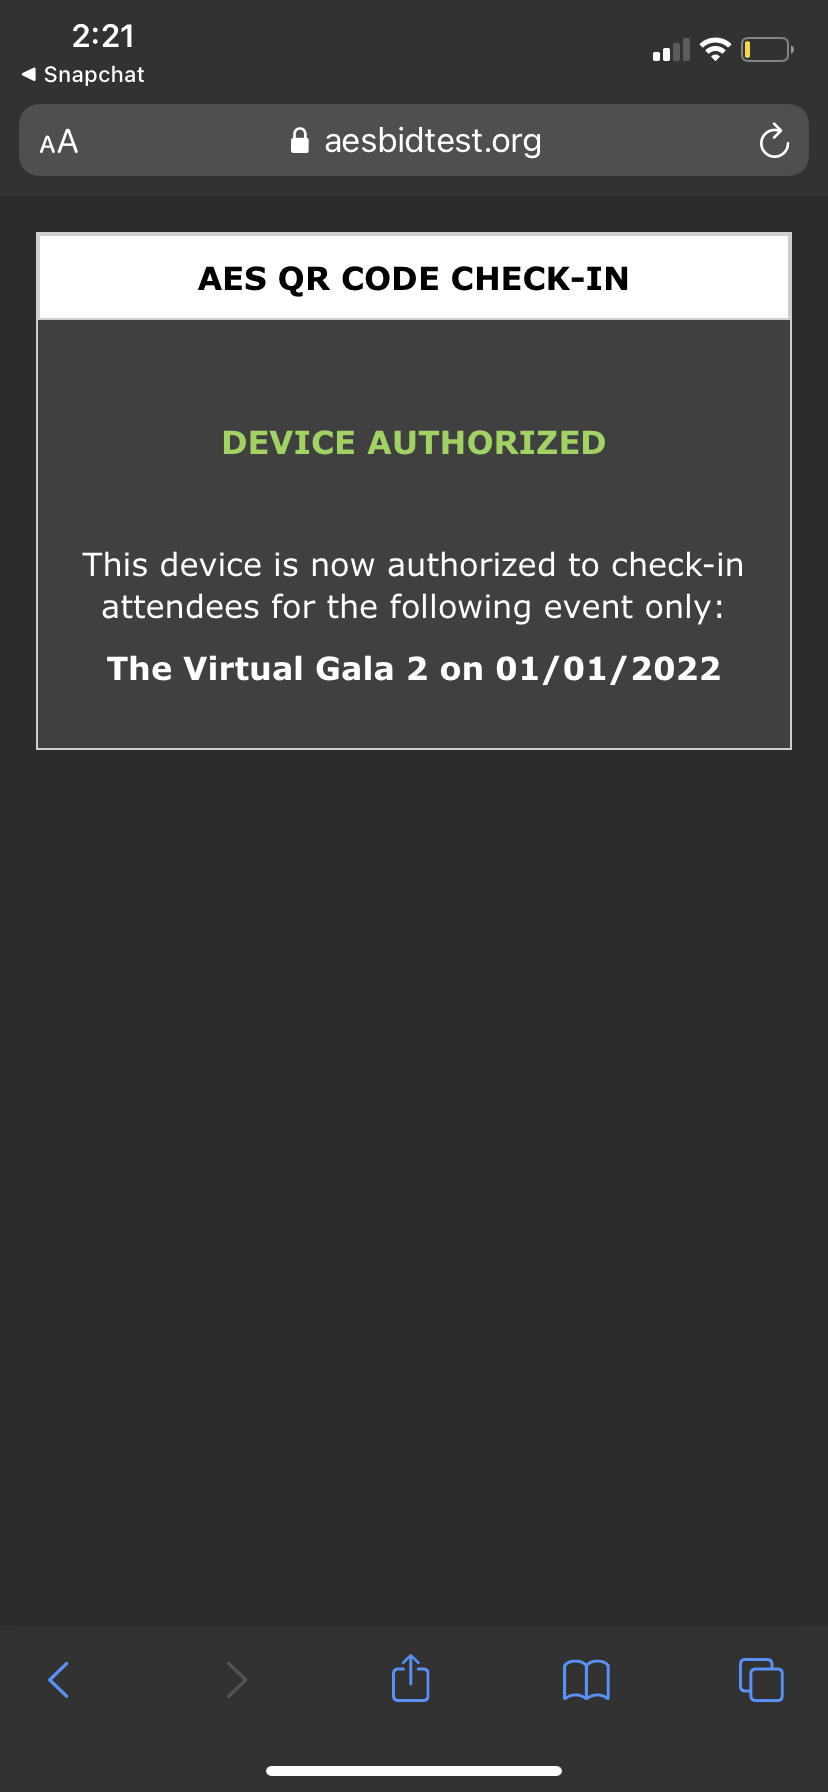
When using your own phone to scan QR tickets at check-in, it is necessary to give the device permission to access your event. This can be done in Setup > QR Ticket Scanning. Follow the displayed instructions to enable each device.
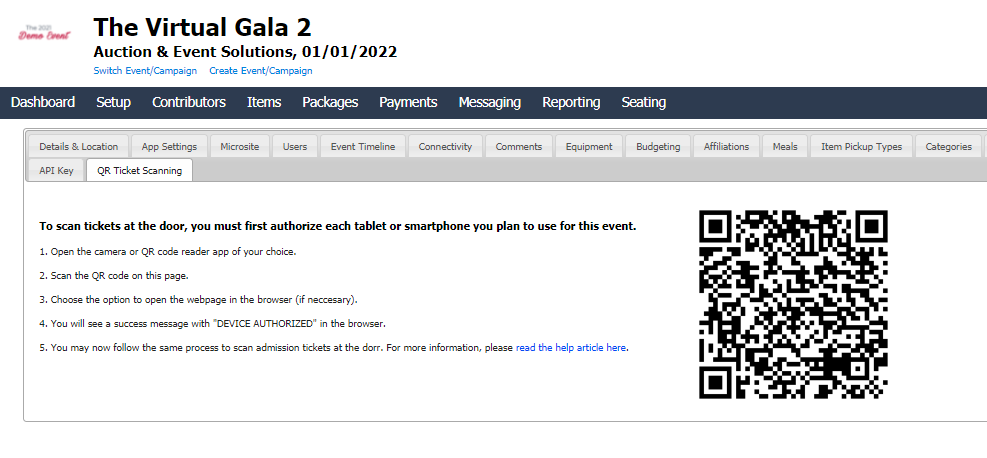
Once the code is scanned with your QR Reading App or Camera App, you will be asked to set the name of the person using the device to check people in. After submitting, the device is approved to scan the Ticket QR Codes for the specific event they were assigned. Each device being used has to go through this process.
Process for scanning
- The first step will be to open the camera app or QR-Code Reader app of your choice.
- Hover the designated scanning device's camera over the QR Code located on the guests confirmation page, printout, or apple wallet ticket. You should then see an option to open a webpage to complete the process.
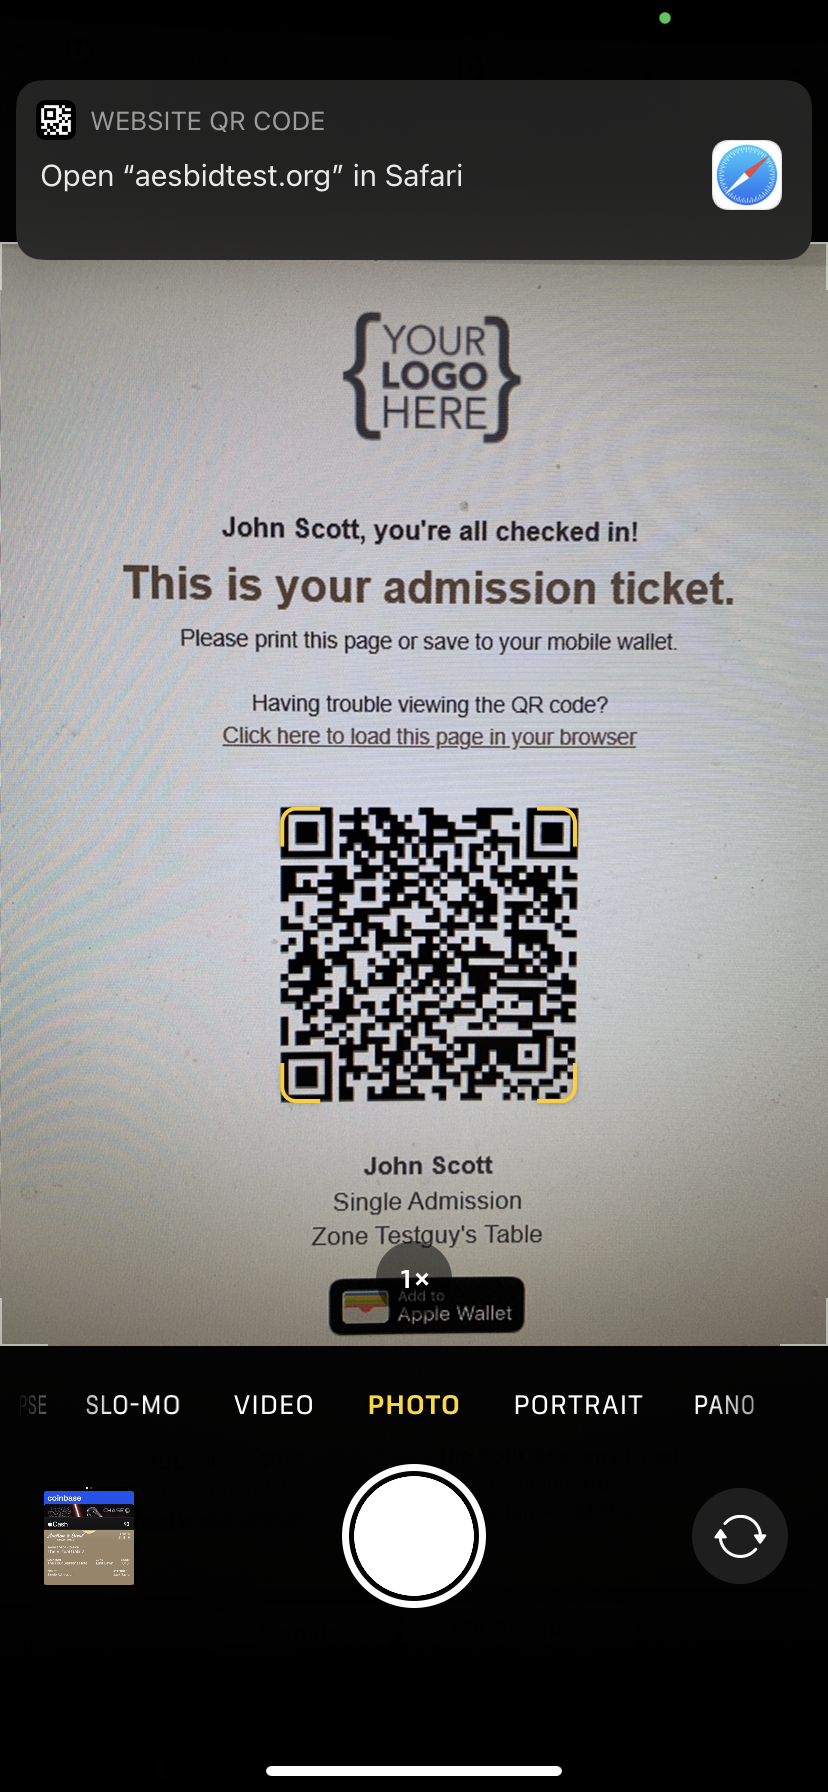
- A webpage will open with information about the ticket holder displayed.
- If the attendee is already opted-in to receive SMS text message notifications, the display will look similar to the green screen below. This indicates they are good-to-go and the scanner can proceed to the next step.
- If they are Opted-Out or don't have a cell phone on file, it will appear orange. the scanner should attempt to collect the users cell phone number so they may receive notifications including the "arrival" text message which may include specific instructions, their bidder# and table assignment.
Opted-In of SMS Notifications 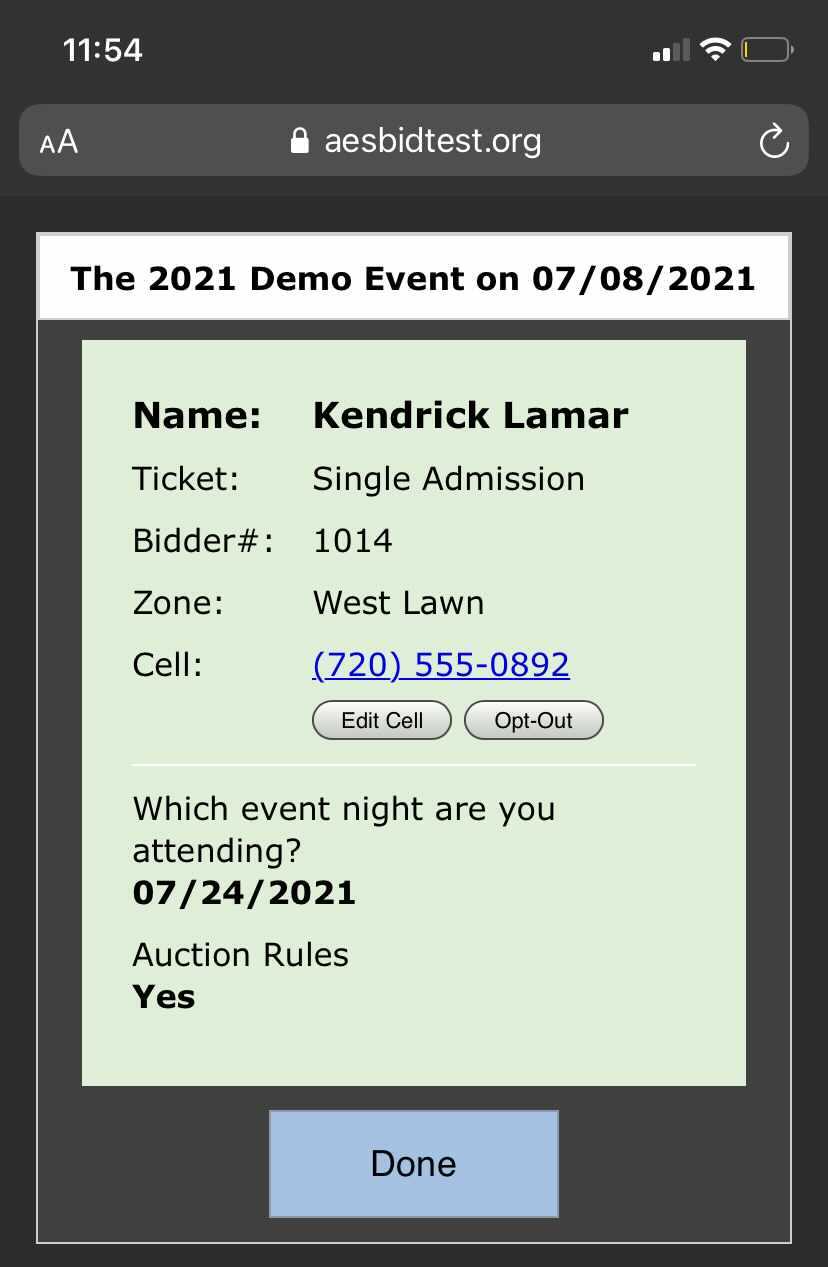 | Opted-Out of SMS Notifications 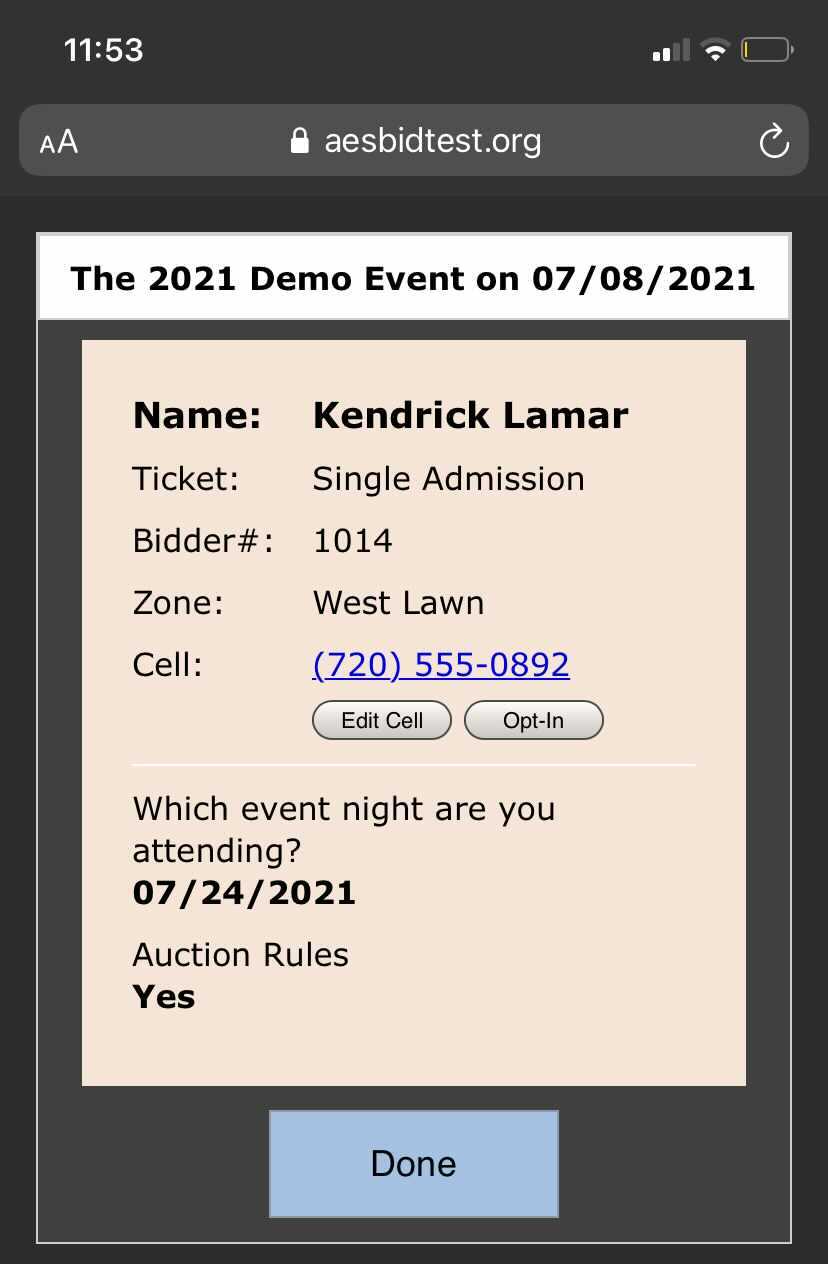 |
- After you've confirmed their information, select Done to mark them as Arrived.
- Close the webpage, return to the Camera, and repeat the process for the next guest.
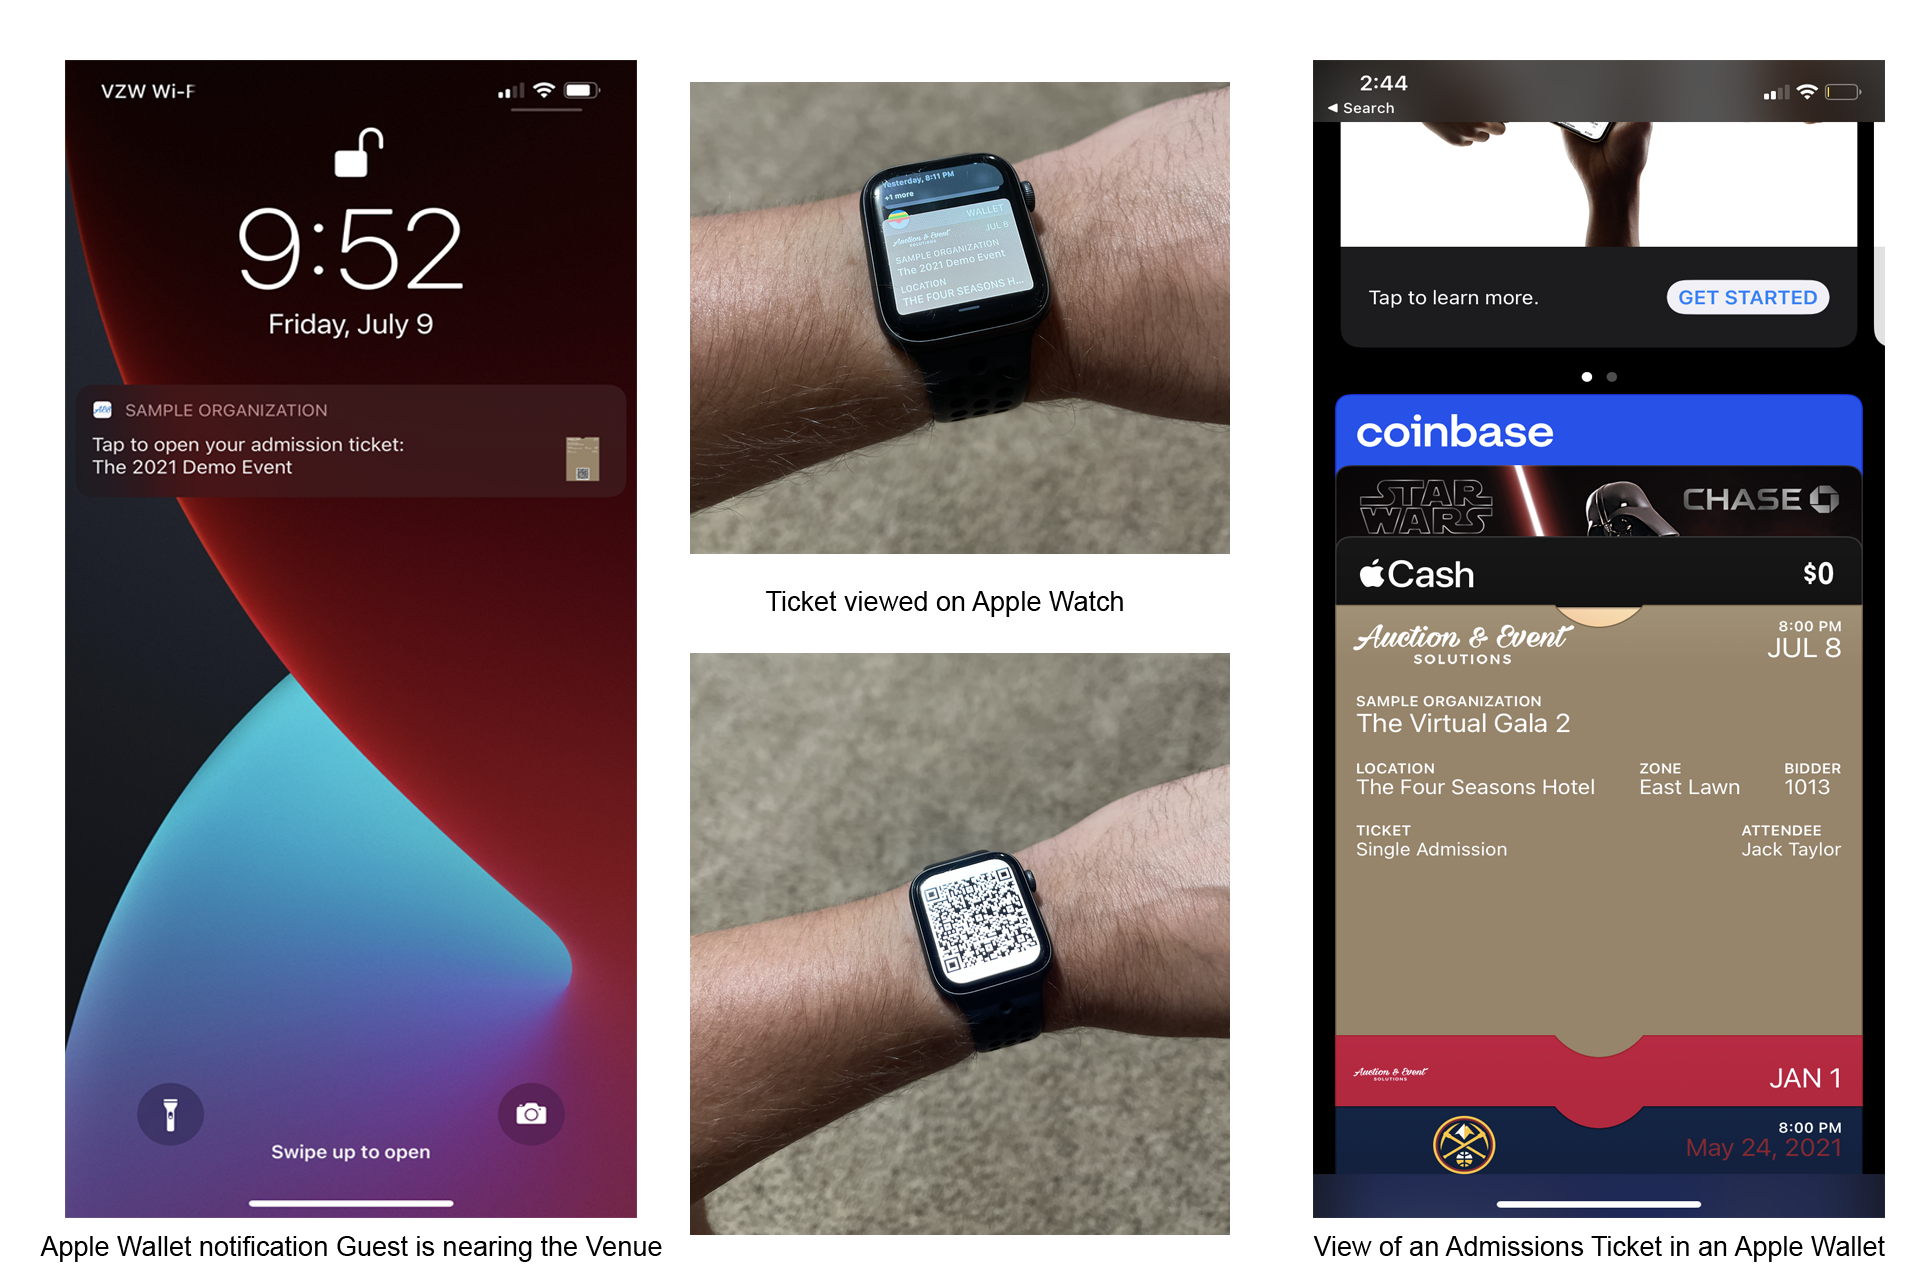
How can a guest access their ticket?
Guests will first be asked to complete Express Check-In via SMS or email with a secure link. This link will take them to the Express Check-in function located on the Event Landing Page. Once completed, guests will see a confirmation page with their QR code ticket, and from here can add the ticket to their Apple Wallet, bookmark the URL, or print a paper version of the ticket. They will also receive an email containing the same information, which they may flag/save in their inbox or print.

How did we do?
QR Code Ticketing - Interpreting and Editing Data
Recognizing Personal Sponsors