Entering RSVP's (Ticketing Admin Mode)
Admin Mode. When entering RSVP's on behalf of the patron, it is recommended to use the ticketing microsite as opposed to auction conductor. This is because the ticketing microsite will enforce variou…

Admin Mode
When entering RSVP's on behalf of the patron, it is recommended to use the ticketing microsite as opposed to auction conductor. This is because the ticketing microsite will enforce various settings (required fields, custom questions, etc) and will create the appropriate contributor records for large groups. Also, it will correctly associate secondary contributors back to the buyer when multiple tickets are purchased together. And best of all, the microsite will automatically send a confirmation email to the buyer, which will enable them to update guest names later using a link provided in the email. While all of these functions are possible to configure manually in auction conductor, it is easy to miss a step or required field and can be quite time consuming to accomplish.
We created Admin Mode on the microsite to give event organizers an efficient way to enter RSVPs while also recording payment types not usually offered to the general public.
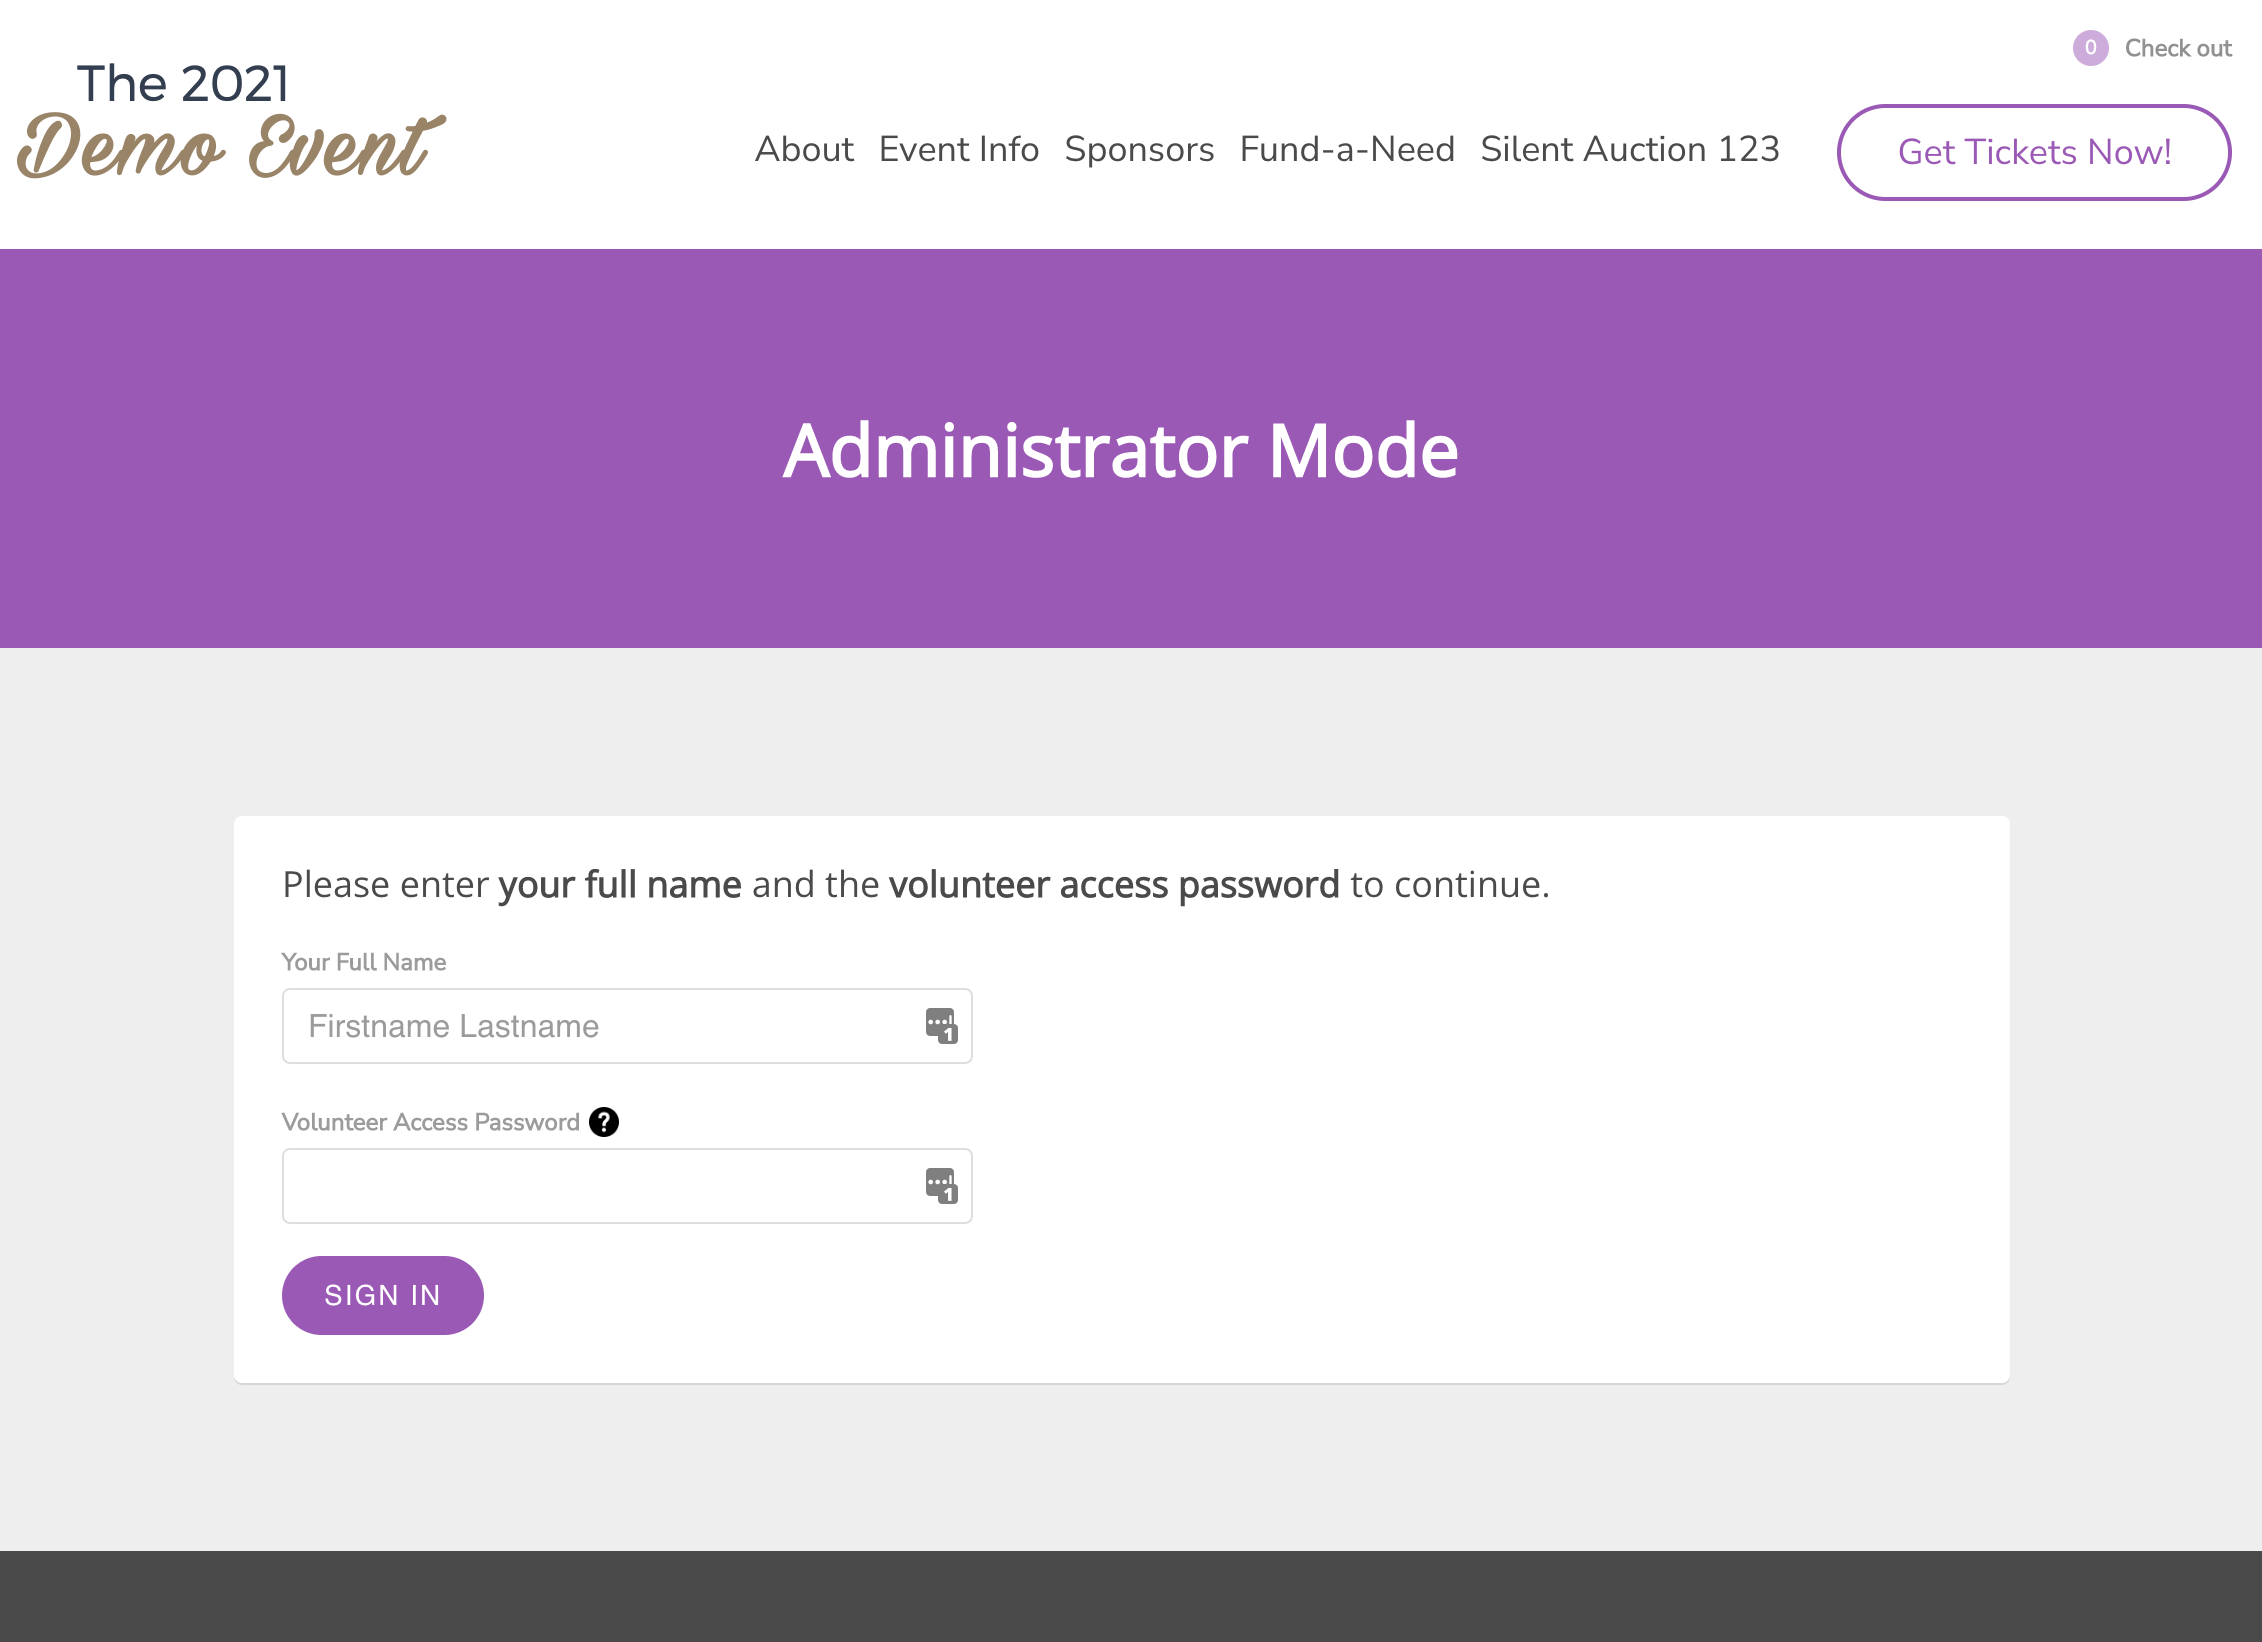
To Enter Admin Mode
Log into Auction Conductor and visit the Contributors page. Click the Ticketing Admin button to open the admin login page in a new browser tab.

Now on the admin login page, enter Your Full Name for auditing purposes.
The Volunteer Access Password is unique to each event/campaign, and can be found in Auction Conductor > Setup > App Settings.
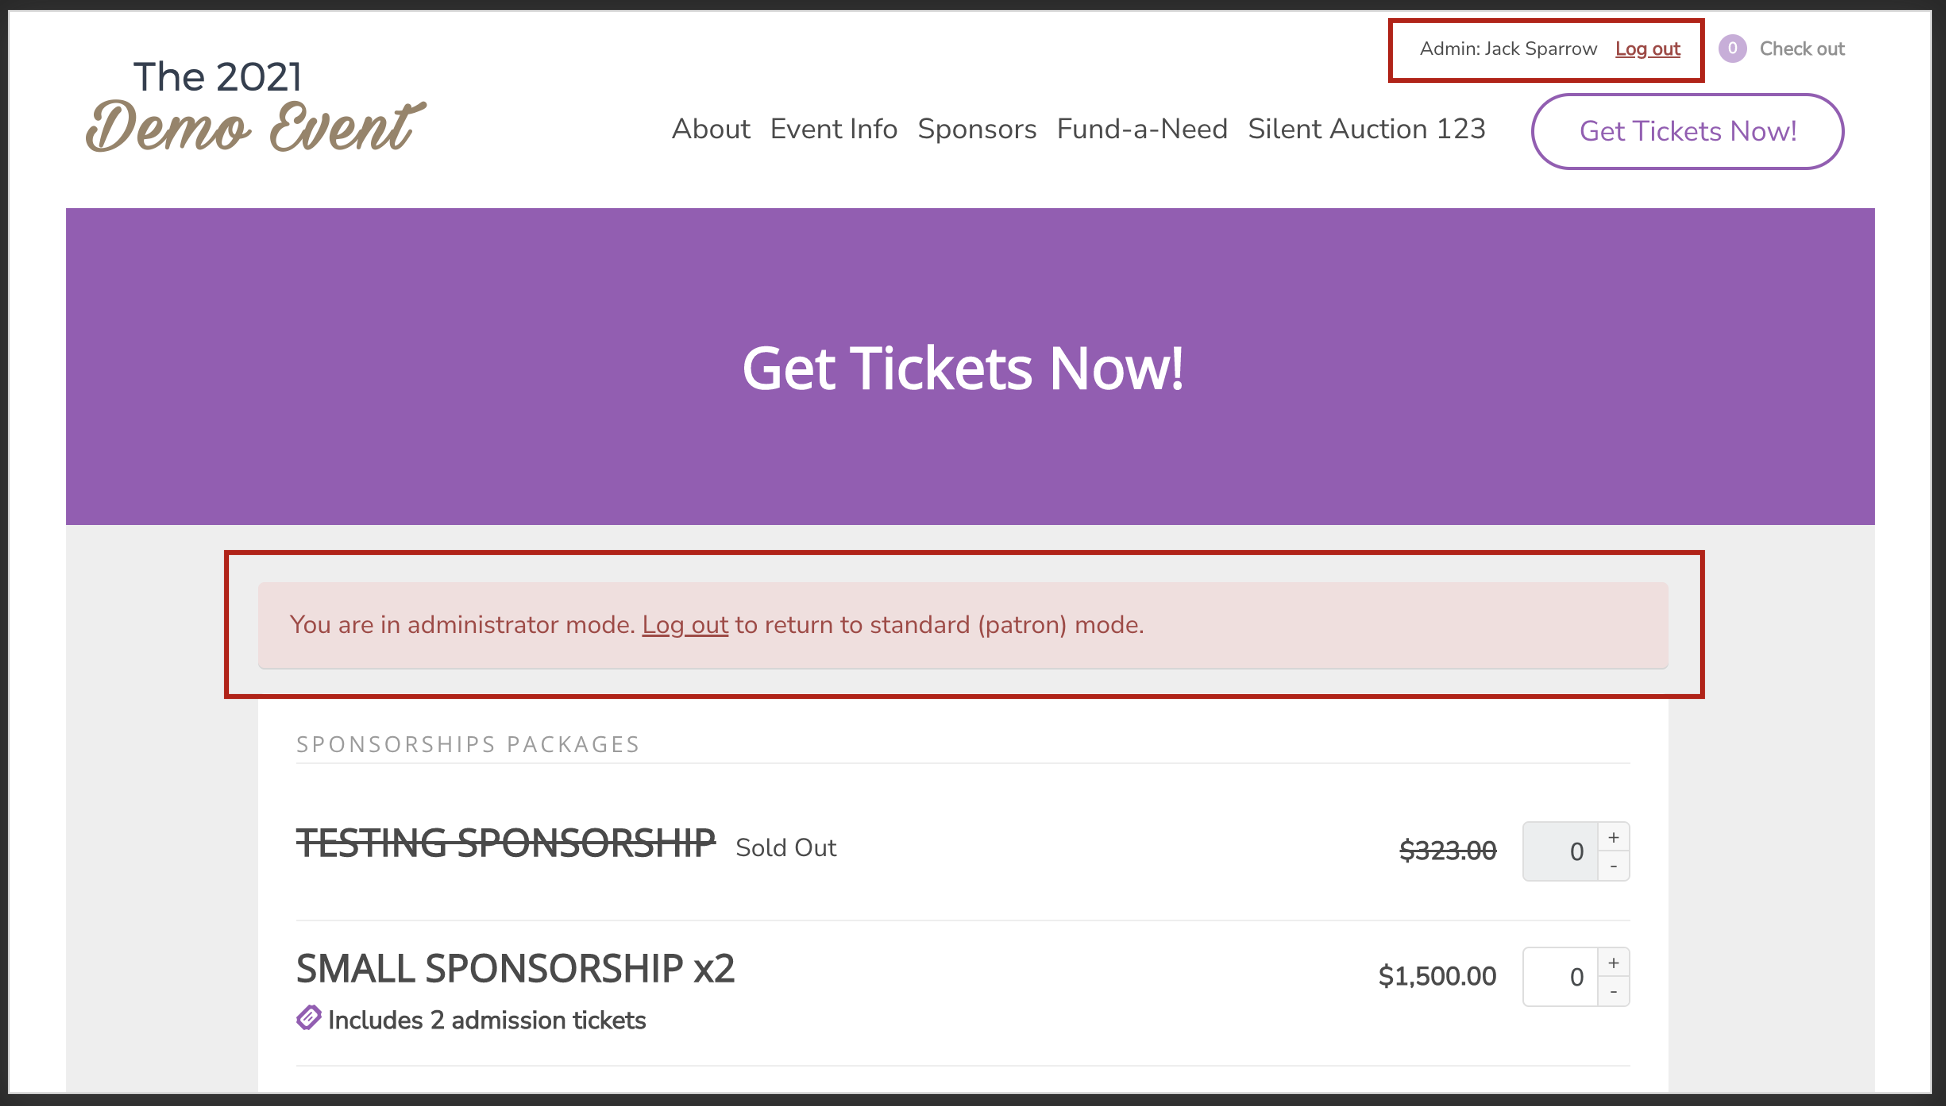
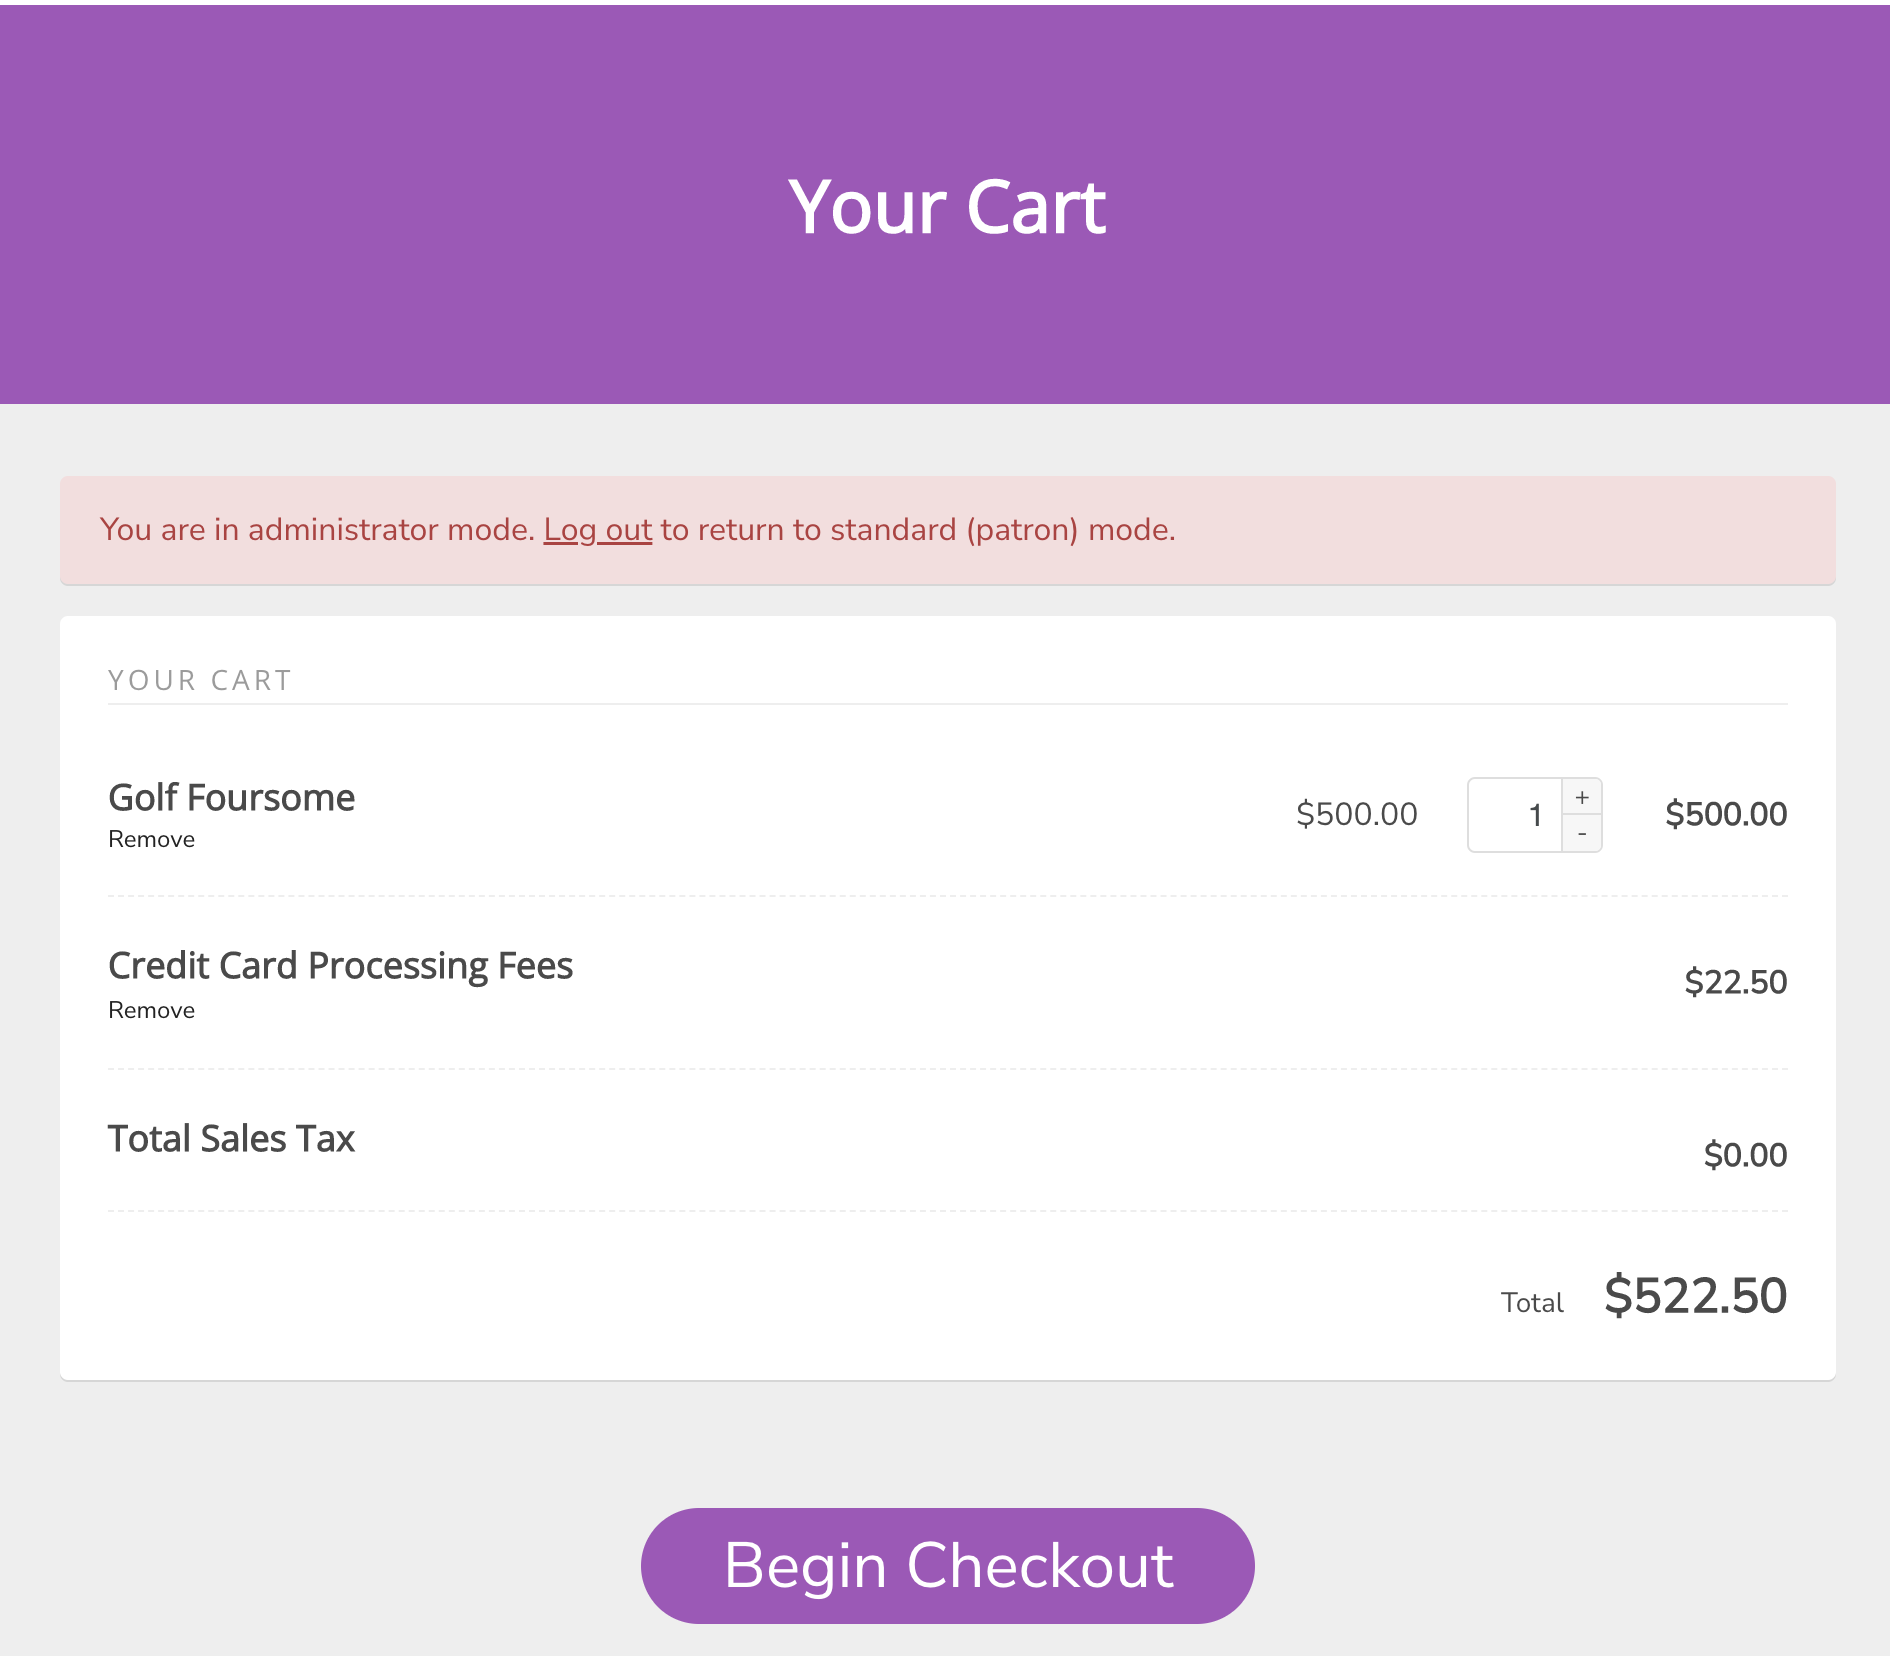
Once logged in, you will see the text "Admin:" with your name at the top right of the screen. You will also see a mid-screen notification on pages where packages can be purchased, and at checkout.
Entering RSVP's
Now that you are logged in, you may proceed to purchase anything on behalf of the patron. Add items to the cart, and when complete, go to checkout.
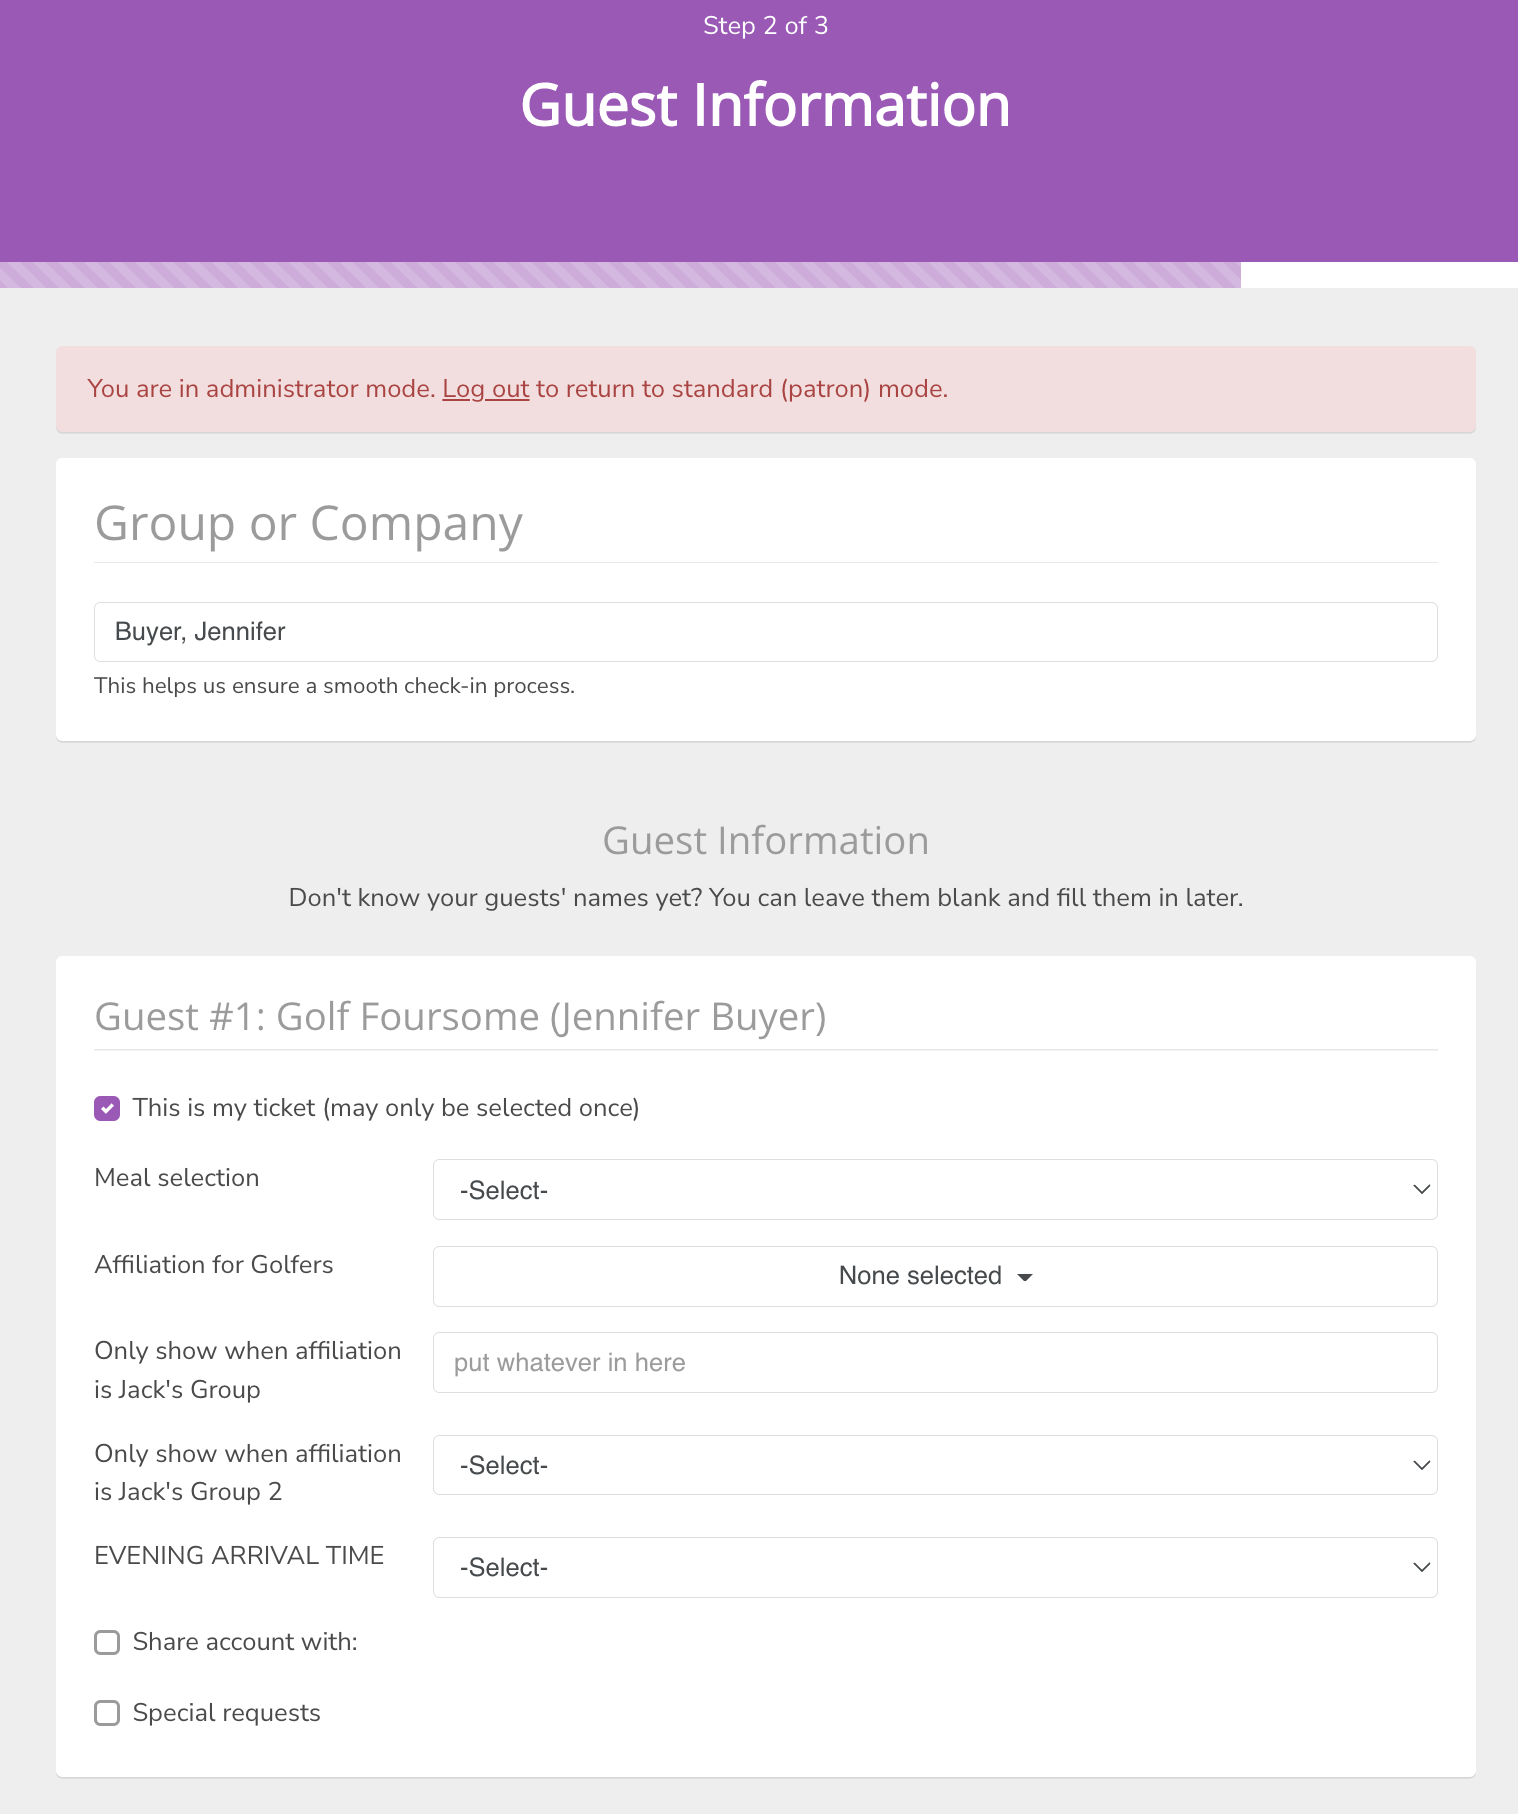
During the checkout process, you will need to enter accurate information for the buyer.
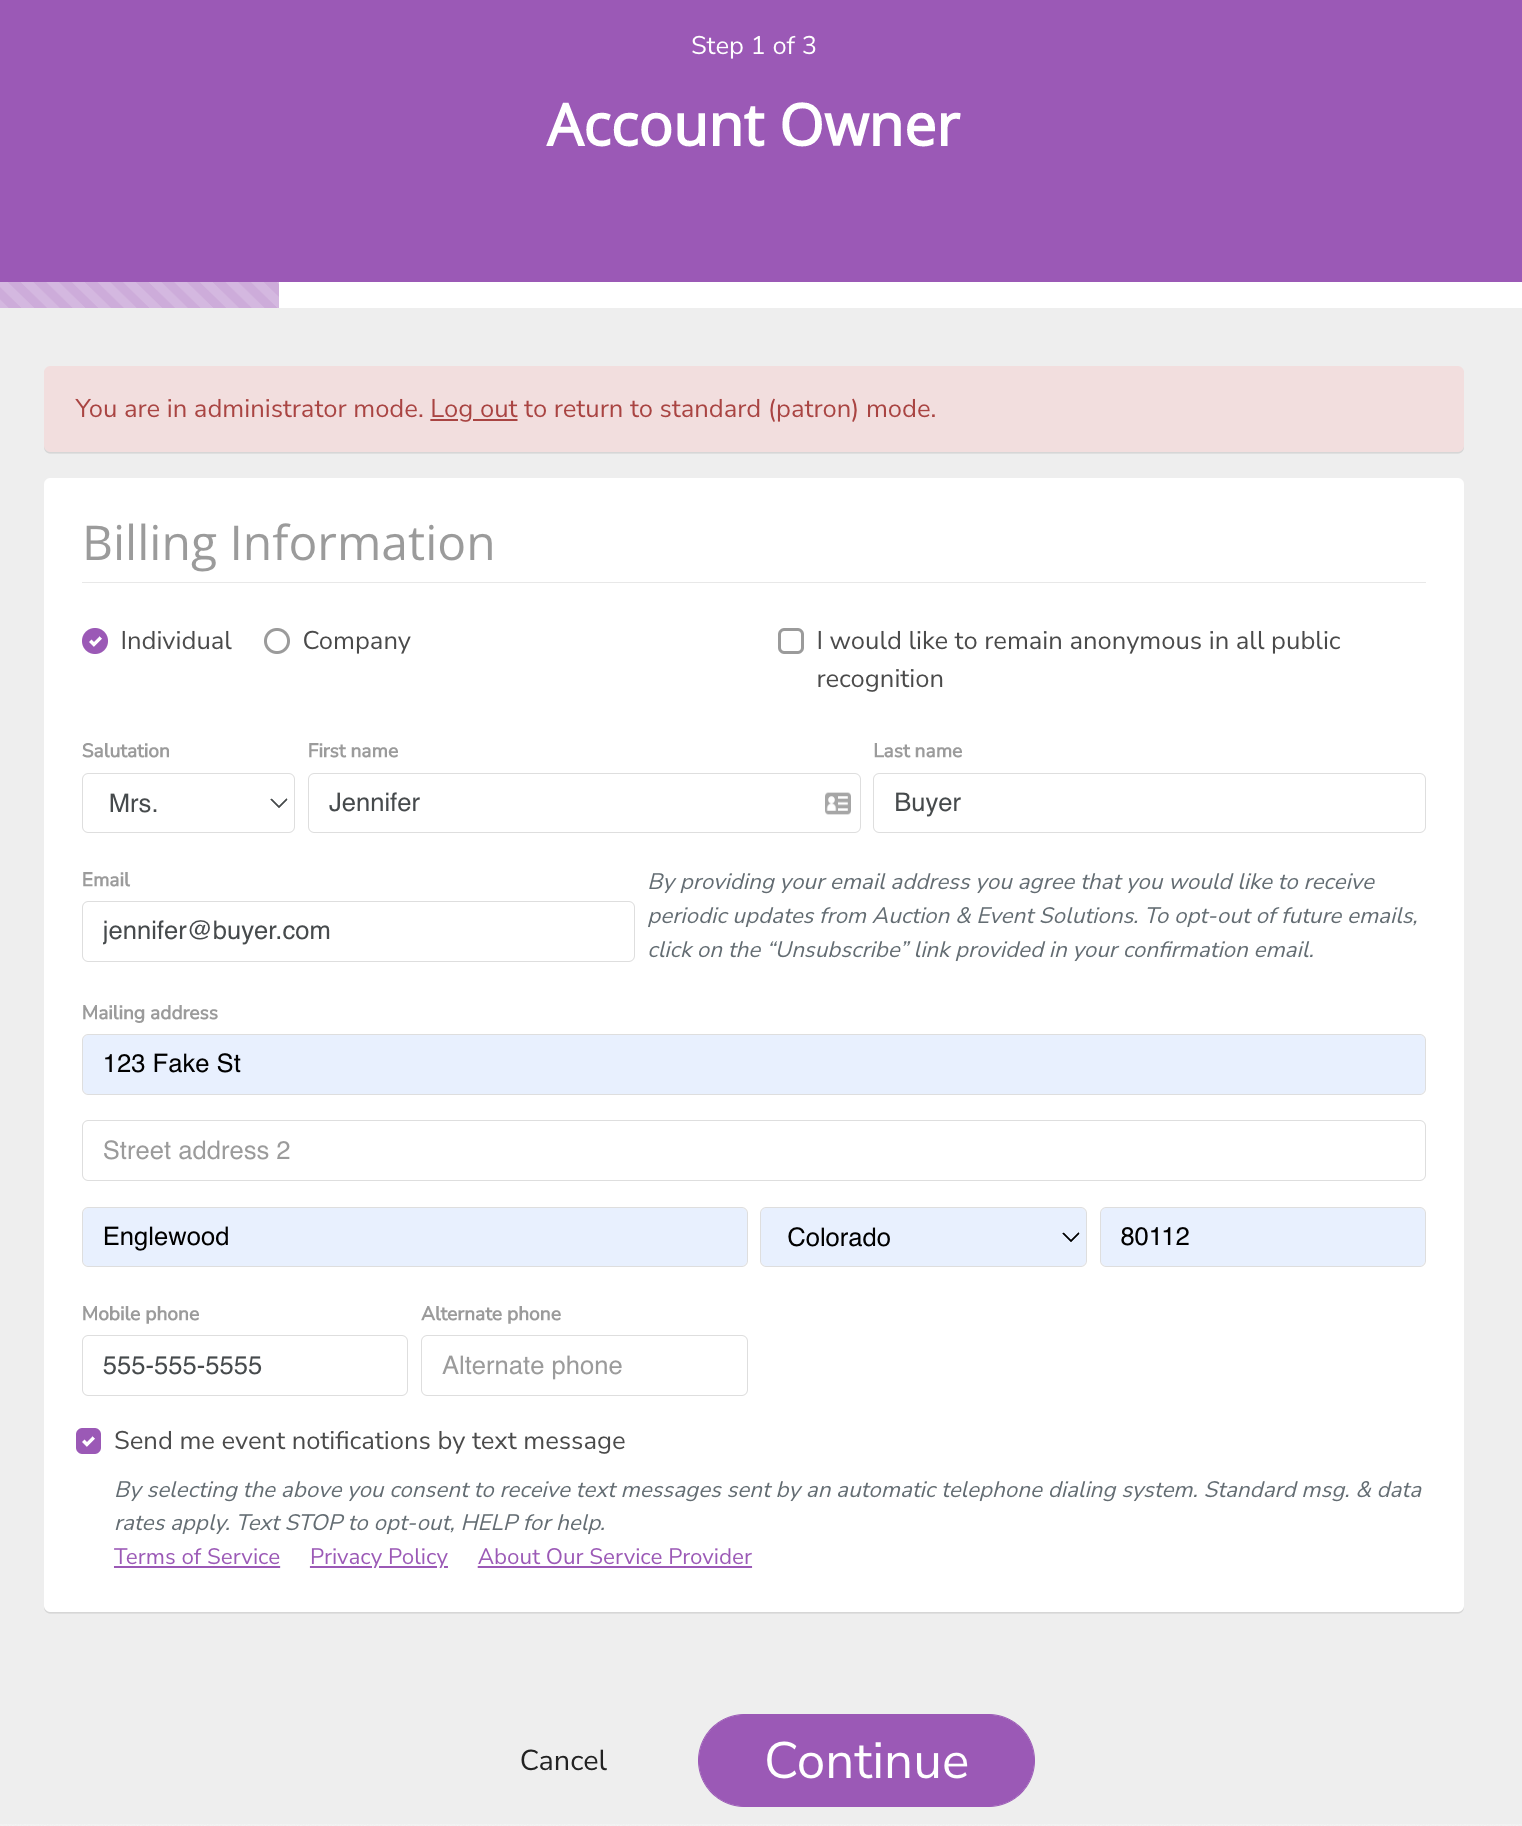
Enter the correct information for the group and guest records, if applicable.
If you dont know the guest names yet, they will be filled in for you as "Guest of {buyer name}" so its ok to leave them blank.
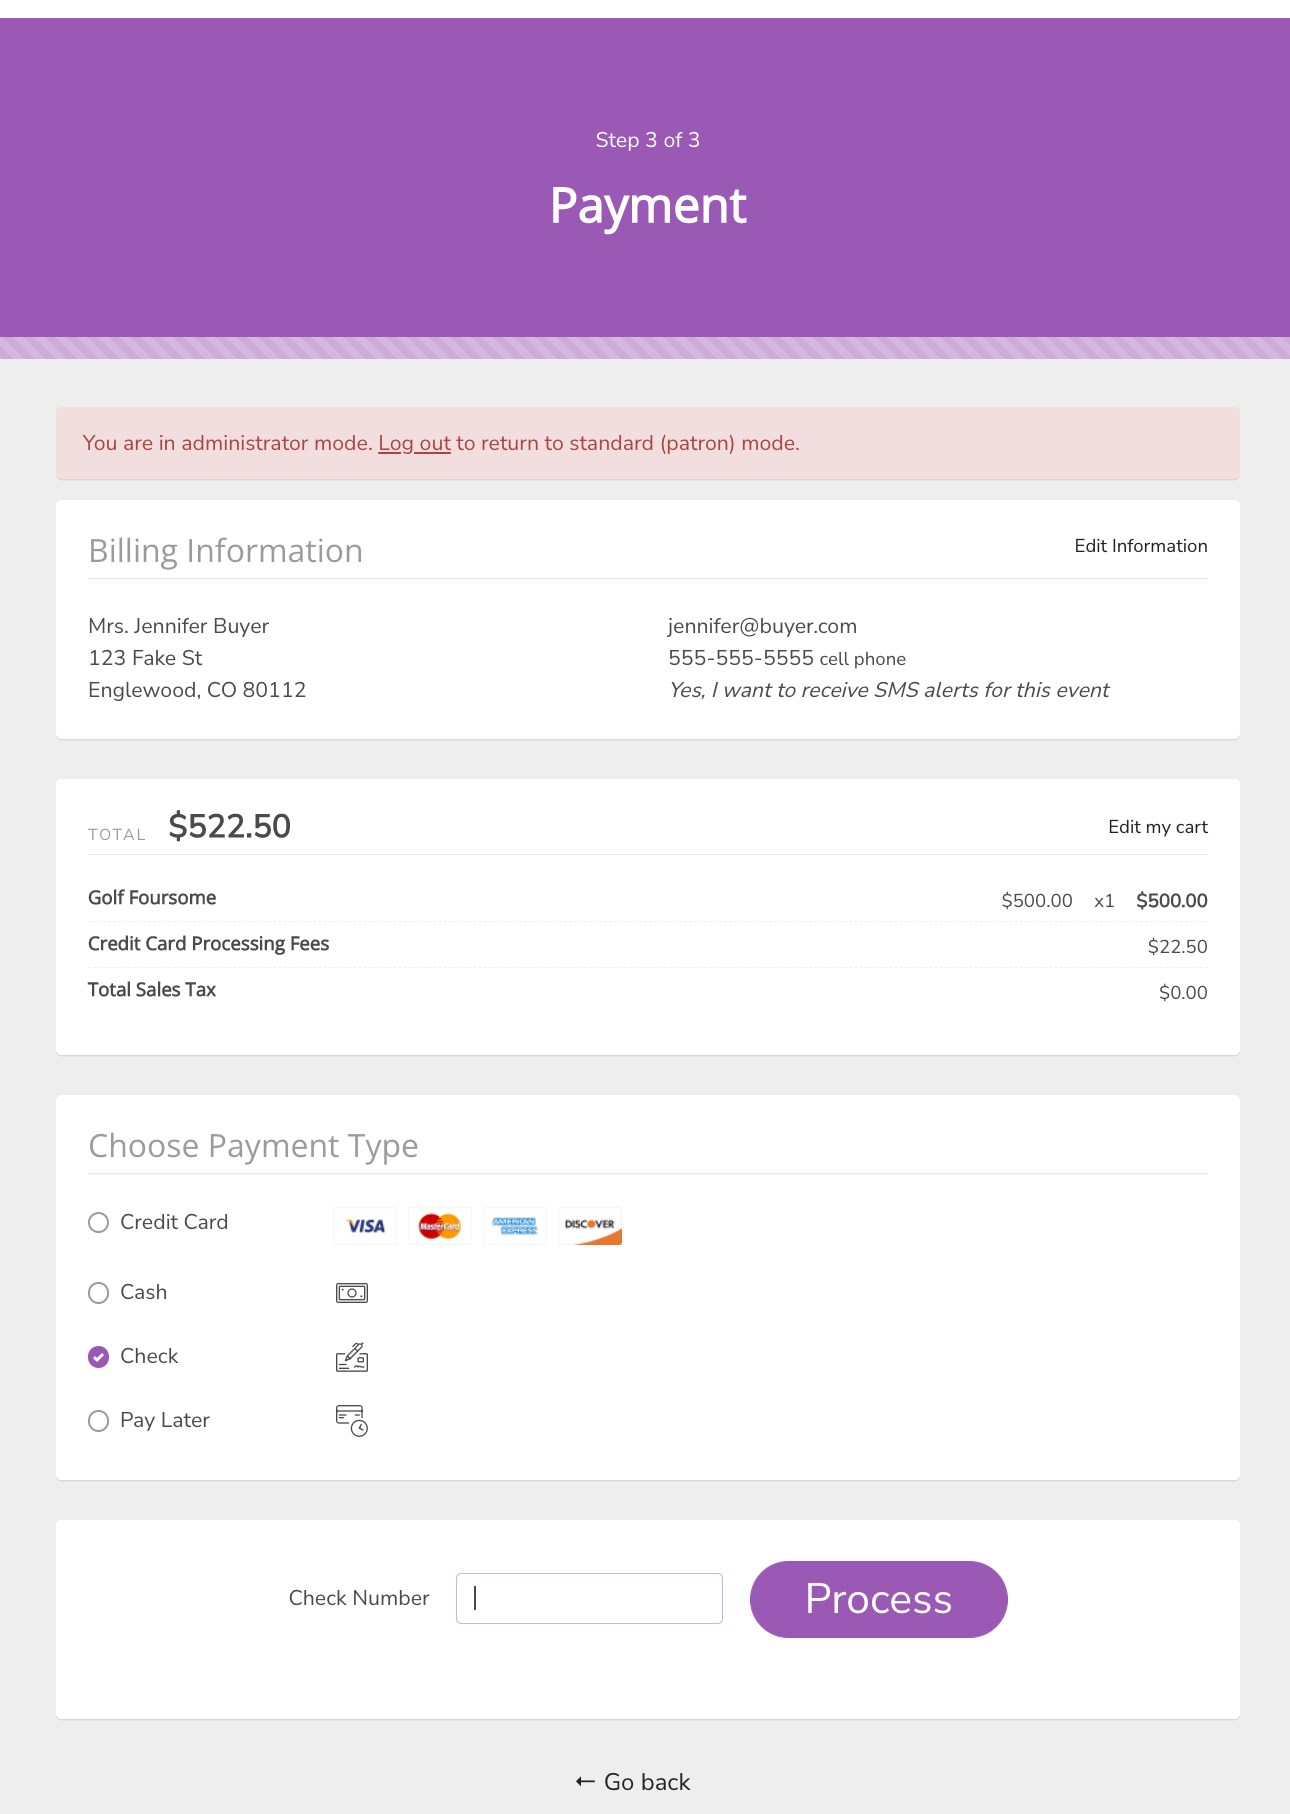
On the final step of checkout, you will notice that you have the ability to enter a few payment types that are hidden from regular (non-admin) users.
- Cash
- Check (with check number field required)
- Pay Later (will show a balance due on the confirmation email)
Once complete, the buyer will automatically be sent a confirmation receipt, just like regular users.
You are now ready to proceed with entering the next RSVP!
How did we do?
Auction Display Sheets
How to Enter Auction Packages