Custom Fields Setup
How to Add Custom Fields to an Event or Organization Custom fields let you collect extra information from buyers during checkout. You can create fields that apply to all events for your organization…

Updated
by Meredith Cantrell
How to Add Custom Fields to an Event or Organization
Custom fields let you collect extra information from buyers during checkout. You can create fields that apply to all events for your organization or just one specific event.
- Click Setup and navigate to Custom Fields in the menu.
- You’ll see two sections:
Fields for All Events – applies to every event for the organization.
Fields for This Event Only – applies to this specific event.
- You’ll see two sections:
- Choose whether you want to ask the question at every event the organization has or for this event only, click "Add a Field" under that section.
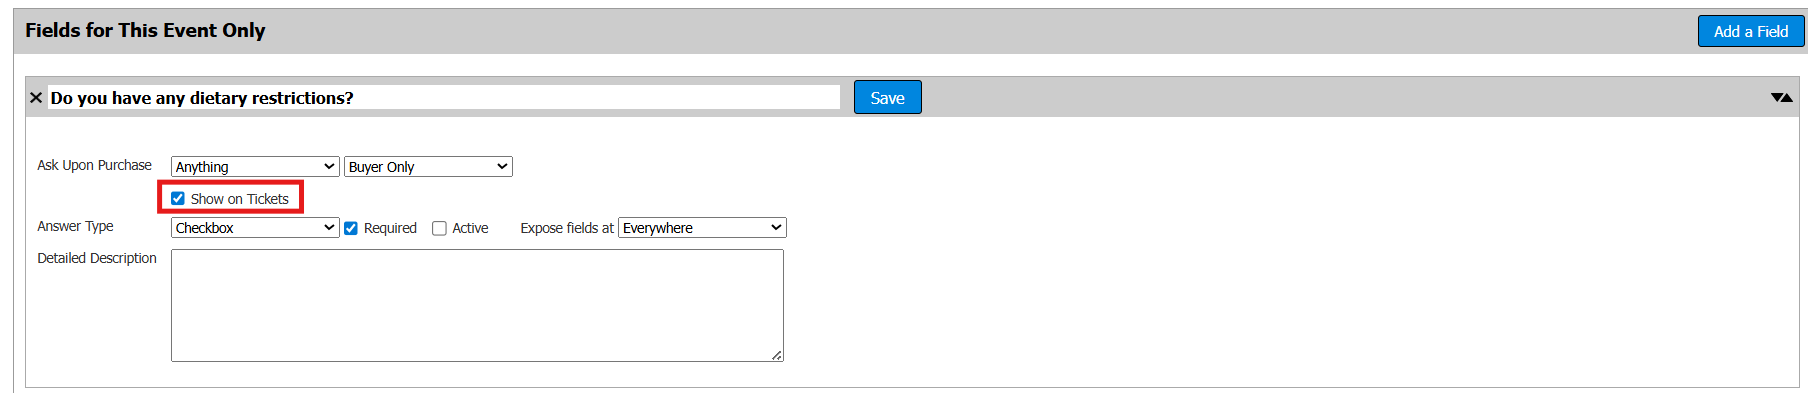
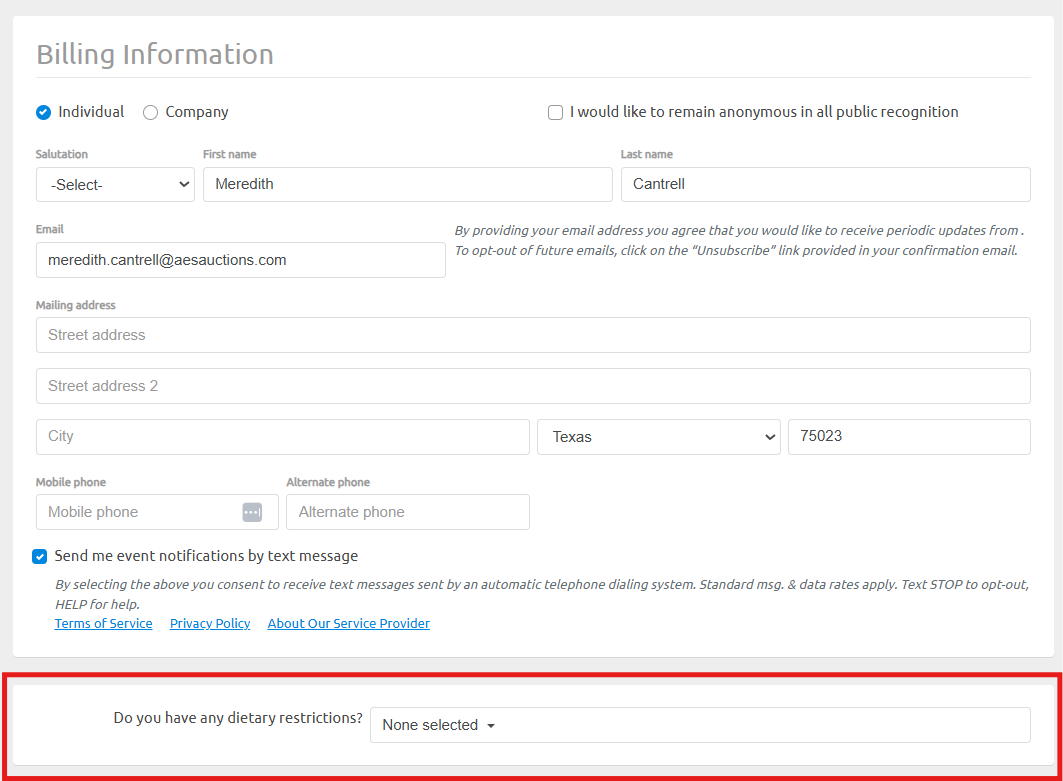
- Type your question or comment (e.g., “Do you have any dietary restrictions?”).
- Choose when the question should appear to buyers:
- Ask Upon Purchase :
- Anything - Visible to only buyers, regardless of what they purchase (e.g., admission tickets, sponsorships, donations, multi-units etc.).
- Any Donation - Only shown to buyers who purchase a donation.
- Any Sponsorship - Only shown to buyers who purchase a sponsorship.
- Any Admission Ticket - Only shown to buyers who purchase an admission ticket.
- Specific Package - Allows you to choose one or multiple packages created, and allows you to show the question to:
- Buyers only
- Attendees only
- Everyone
- Ask Upon Purchase :
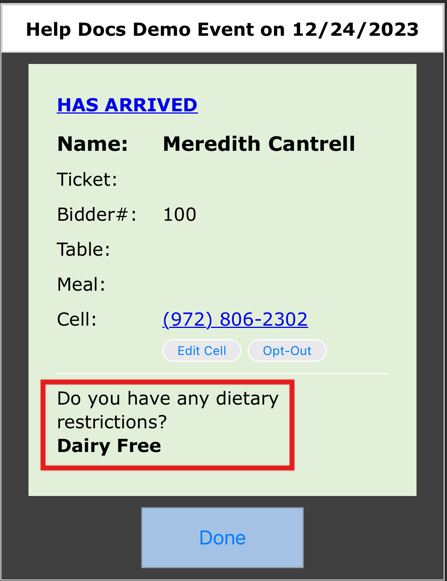
- Once you’ve selected the package(s) for your custom field, you’ll have the option to show the answer on tickets.
If selected, the answer will appear on the confirmation screen after the QR code for Express Check-In screen has been scanned.
The guest will not see their answer on their check-in screen
This is helpful for questions like dietary needs, t-shirt size, or other info staff may need to see quickly at check-in.
- Select the Answer Type for how guests will respond to your custom field:
- Checkbox - The guest will check a box to acknowledge or agree with a statement.
i.e. “By selecting this box, you agree to the statement above.” - Short Text - Allows the guest to type a brief answer.
i.e. Name or date - Long Text - Allows the guest to type a longer response.
i.e. Address or special requests - Single-Select - You can have Guests select one Sponsor from a list of Sponsors.
This is helpful if you have guests register separately from their Sponsor/Table Host. Or you can create a Custom List, like dietary restrictions.- If you choose the Custom List, click Add Another Option to enter choices.
- Select a Default Option.
- Make sure all options are marked Active.
- Checkbox - The guest will check a box to acknowledge or agree with a statement.
- Multi-Select - Guests can choose multiple options from a list of Sponsors, Affiliations, or a Custom List.
- If a Custom List is chosen, click Add Another Option for each choice.
- Select a Default Option if needed.
- Ensure all options are marked Active.
- Date - Asks the guest to enter a specific date.
- Choose whether you want to require the answer or not by selecting the Required box.If you select the Required box, the guest will not be able to move forward until the question is answered. If you do not select the Required box, then the guest will be able to move to the next step without answering the question.
- You must also check the Active box to make the question visible to the appropriate guests.
- Decide where your custom field will appear:
- Microsite Checkout - Shown on the checkout page of your public ticketing site.
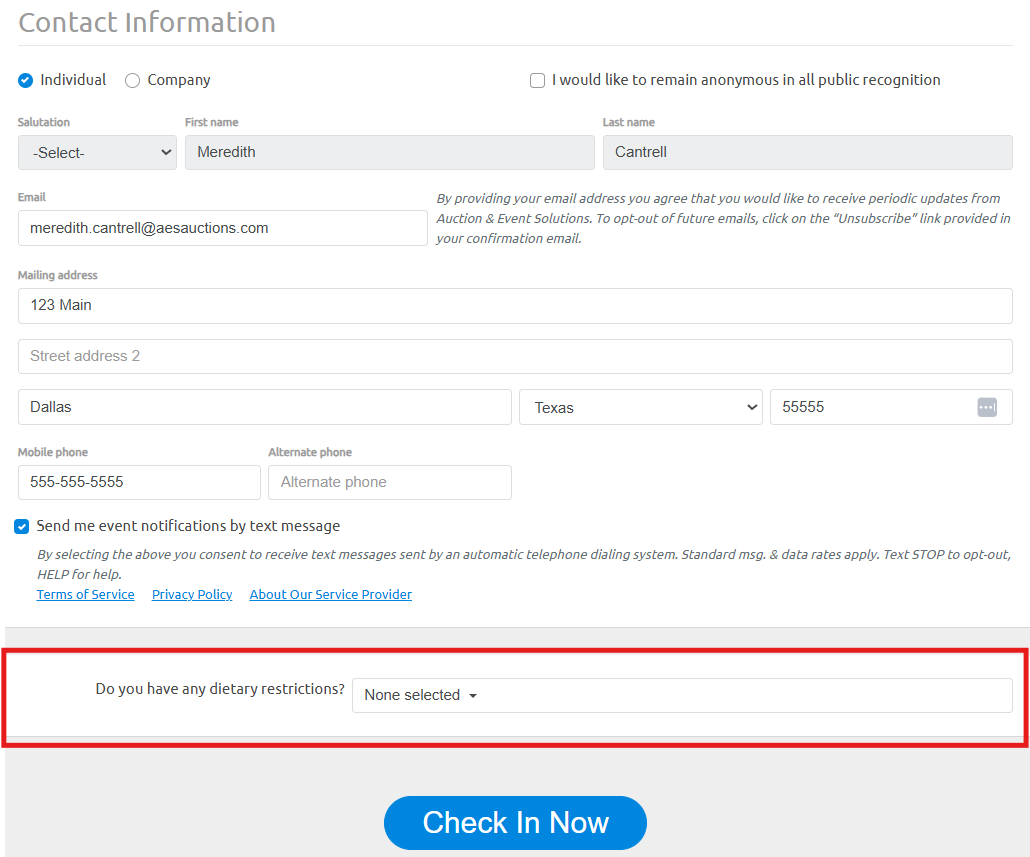
- Express Check-In - Shown during the express check-in process when guests check themselves in.
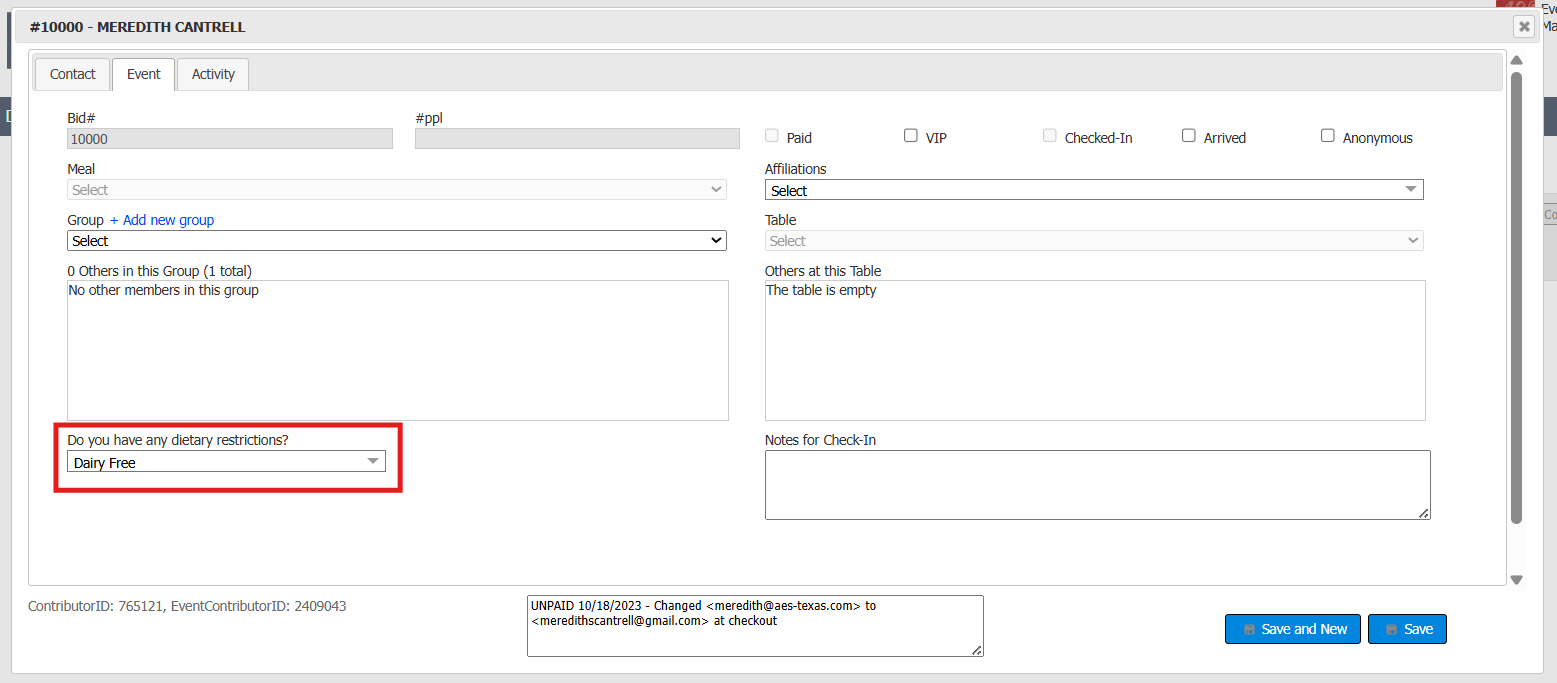
- Backend Apps Only - Visible only within Auction Conductor tools, including:
- Auction Conductor (AC)
- QR code scan confirmation screen during Express Check-In
- Event Manager (EM)

- Auction Conductor (AC)
- Everywhere - Makes the field visible in all the above locations.
- Once all settings are configured, don’t forget to select Active and click Save!
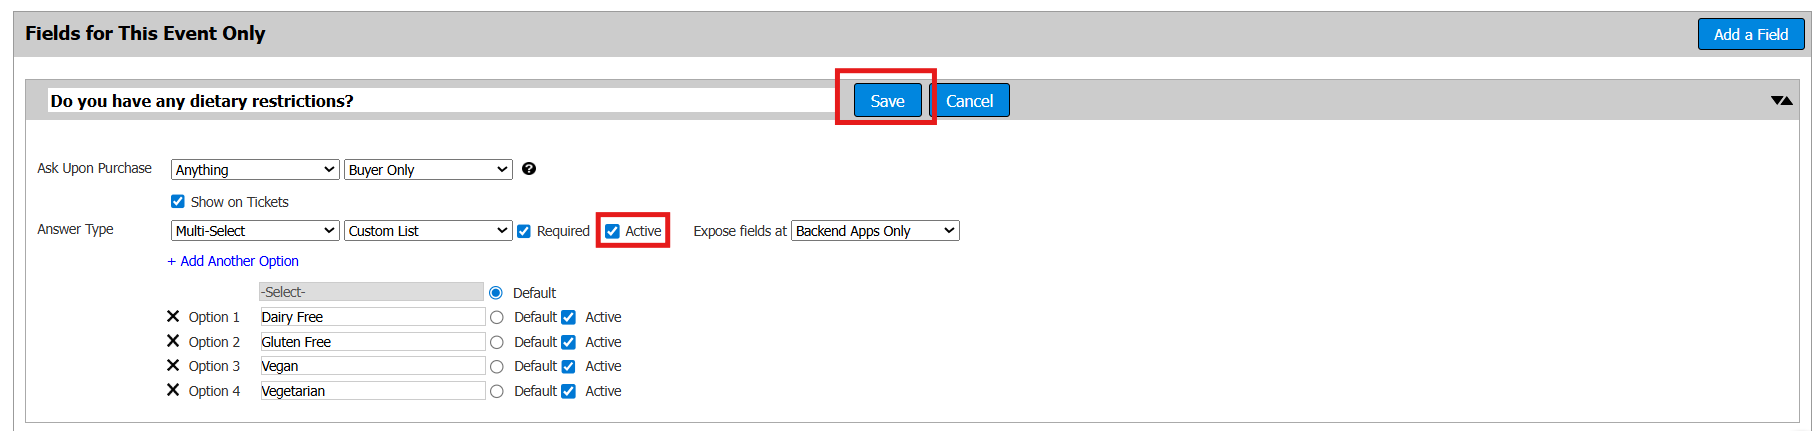 Your field won’t appear unless it’s saved and marked as Active.
 - Microsite Checkout - Shown on the checkout page of your public ticketing site.
How did we do?