Choosing Fields to See at Check-In
Customize check-in field visibility in AES Event Manager via Advanced Tools. Select which attendee information displays to staff for streamlined event check-in operations.

Updated
by Jon Doehling
During staffed check-in, it's helpful to display only the fields most relevant to your current event. While check-in staff typically need quick access to bidder numbers and seating assignments, they may also need to see ticket levels, contact information, or custom question responses depending on your event's needs.
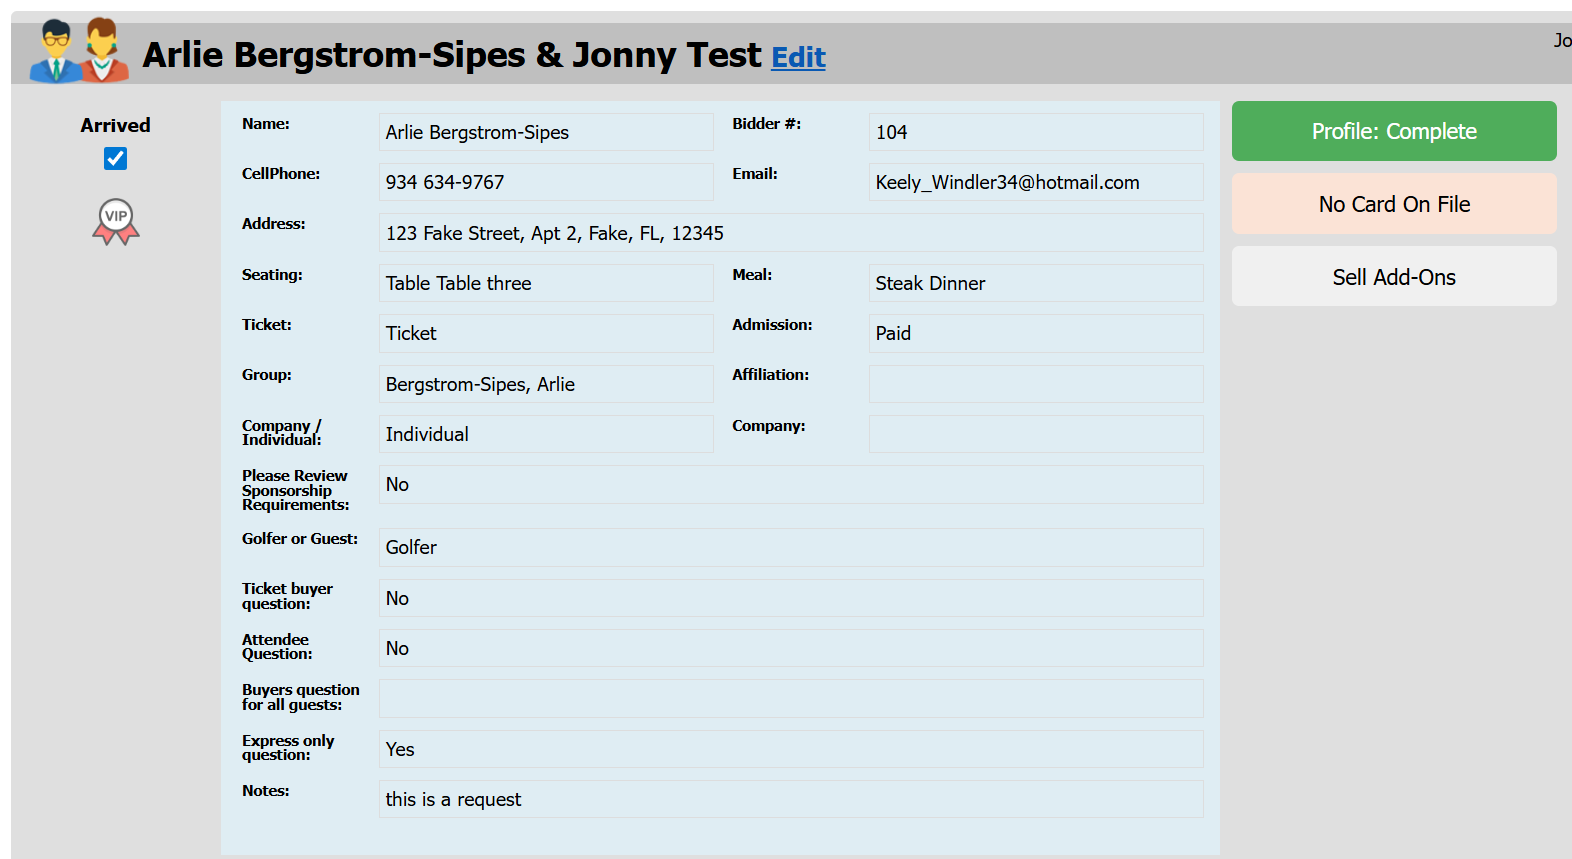
Here's an example showing all standard fields displayed, which may overwhelm check-in staff with too much information:
To customize which information appears for check-in staff:
- Log in to AES Event Manager as an administrator
- Navigate to Advanced Tools
- Enter the supervisor password when prompted
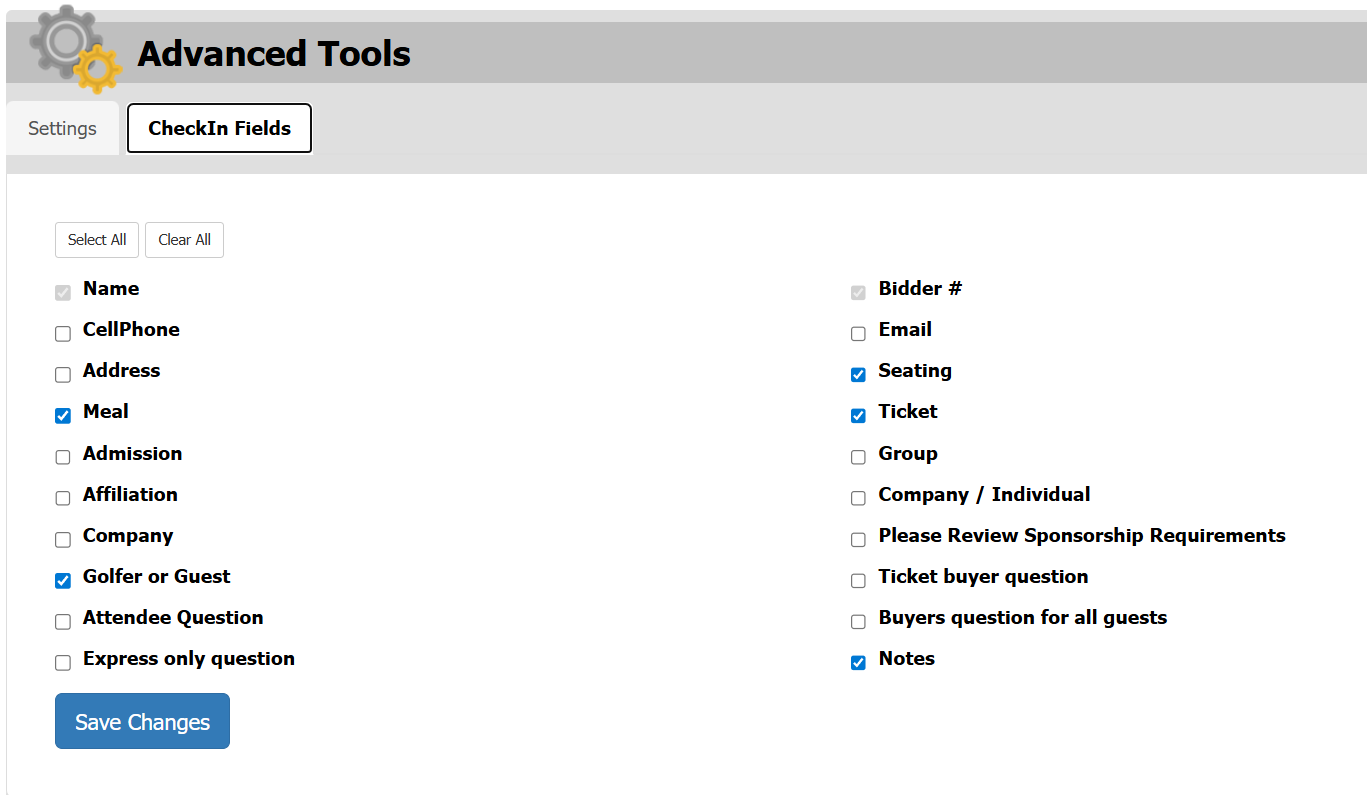
- Click the Check-In Fields tab
- Select only the fields you want to display
- Click Save Changes
The supervisor password is "1989"
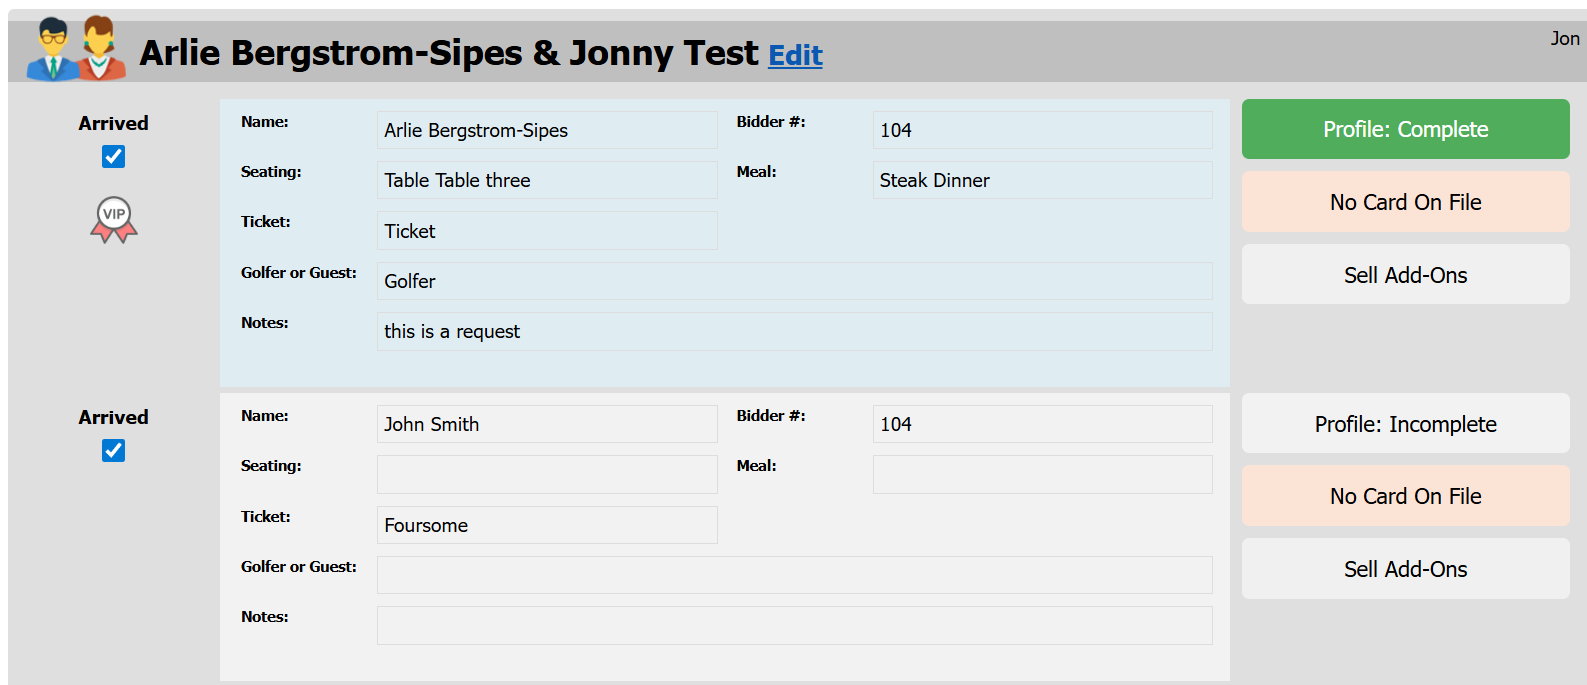
After saving your changes, check-in staff will see only the selected fields for each contributor, creating a cleaner and more focused view.
How did we do?
Event Check-In Process
